Twix Cookie Cups Recipe
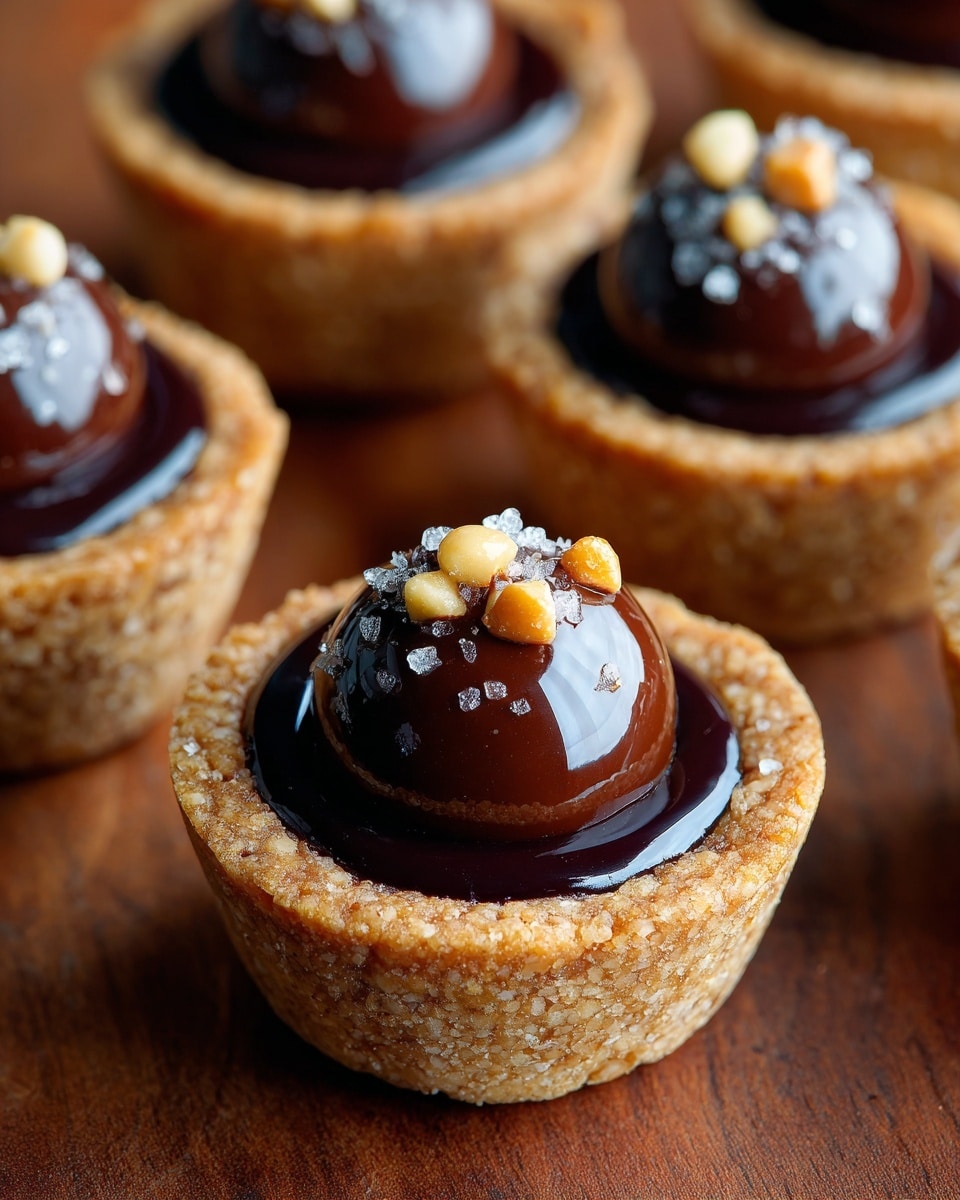
If you love the heavenly combo of chocolate, caramel, and cookie, you are about to fall head over heels for this Twix Cookie Cups Recipe. These bite-sized treats pack all the indulgent flavor of the classic Twix candy bar into a perfectly baked cup of cookie dough, filled with gooey caramel and topped with a silky chocolate drizzle. They are simple to make, irresistibly delicious, and perfect for sharing at parties or savoring as your personal sweet escape. Get ready to discover a new favorite dessert that feels both nostalgic and freshly exciting.
Ingredients You’ll Need
These ingredients are straightforward but essential. Each one brings a unique element to the Twix Cookie Cups Recipe that ensures the perfect balance of softness, sweetness, and richness. From the creamy butter to the gooey caramels, these staples come together to create magic.
- 1 ¼ cups all-purpose flour: This is your cookie cup’s sturdy yet tender base, providing structure without toughness.
- ½ teaspoon baking powder: Just enough to give a light lift to the dough for a slightly airy texture.
- ¼ teaspoon salt: Enhances and balances the sweetness while deepening all the flavors.
- ½ cup unsalted butter (softened): Adds richness and moisture, making every bite tender and melt-in-your-mouth.
- ½ cup granulated sugar: Sweetens perfectly without overpowering the other flavors.
- 1 large egg: Binds everything together and contributes to the soft cookie texture.
- 1 teaspoon vanilla extract: Infuses warmth and depth to the cookie base.
- 18 soft caramels (unwrapped): The heart of the filling—gooey, buttery caramel heaven.
- 2 tablespoons heavy cream: Smooths and thins the caramel for easy filling and luscious texture.
- ½ cup milk chocolate chips: For that final sweet, glossy chocolate layer resembling the classic Twix top.
How to Make Twix Cookie Cups Recipe
Step 1: Prepare Your Oven and Pan
Start by preheating your oven to 350°F (175°C) and lightly greasing a mini muffin pan. This step is crucial so the cookie cups won’t stick and will come out perfectly shaped. If you want an easier cleanup, slip in some mini muffin liners.
Step 2: Mix the Dry Ingredients
In a medium bowl, whisk together the flour, baking powder, and salt. Combining these first helps distribute the rising agent evenly and keeps your cookie cups tender but not crumbly.
Step 3: Cream Butter and Sugar
In a large mixing bowl, beat the softened butter with granulated sugar until the mixture is light and fluffy. This aeration is what makes your cookie cups soft and delightfully tender later on.
Step 4: Add Egg and Vanilla
Beat in the egg and vanilla extract until the mixture is smooth and fragrant. These add moisture and that classic cookie flavor that feels like a warm hug.
Step 5: Combine Wet and Dry
Gradually add the dry ingredients into the wet mixture, stirring just until combined. Overmixing can toughen your dough, so gentle folding is the way to go for that soft crumb.
Step 6: Form the Cookie Cups
Roll the dough into 1-inch balls and place each into your mini muffin pan. Use your thumb or a spoon to press down gently in the center of each ball, creating a well that will hold the luscious caramel filling after baking.
Step 7: Bake Until Golden
Bake for 10 to 12 minutes until the edges turn golden and the centers are still a bit soft. If your wells lose shape during baking, gently press them back using the spoon’s back while the cookie cups are still warm.
Step 8: Melt and Pour the Caramel
While the cookie cups are cooling, melt the unwrapped caramels with the heavy cream in a microwave-safe bowl. Heat in 30-second intervals, stirring in between until smooth and glossy. Spoon the caramel into the wells of each cookie cup until about three-quarters full.
Step 9: Add the Chocolate Layer
Next, melt the milk chocolate chips in 20-second bursts, stirring carefully until silky smooth. Drizzle or spoon the chocolate over the caramel layer, giving your cookie cups that classic Twix finish. Let them cool completely so the chocolate sets perfectly before serving.
How to Serve Twix Cookie Cups Recipe
Garnishes
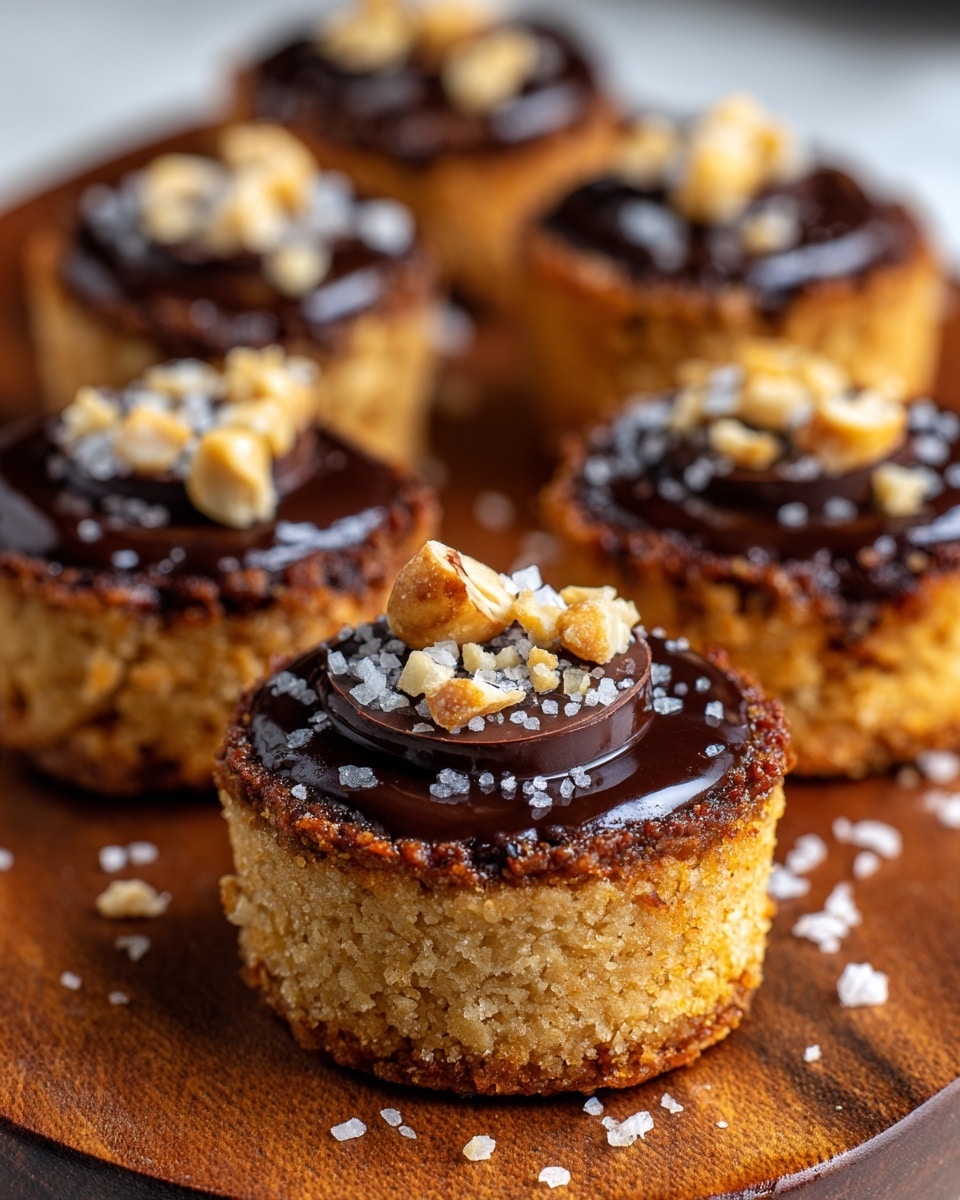
Dress up your Twix Cookie Cups Recipe with a sprinkle of flaky sea salt to contrast the sweetness or finely chopped toasted pecans for a little crunch. A dusting of cocoa powder or a drizzle of white chocolate can also elevate their look and flavor beautifully.
Side Dishes
Pair these cookie cups with a scoop of vanilla bean ice cream or a small bowl of fresh berries to balance the richness. A cup of strong coffee or creamy hot chocolate makes an ideal companion for enjoying these little sweet treasures.
Creative Ways to Present
For a fun twist, place the cookie cups on a decorative platter with edible gold leaf accents, or wrap a cluster in clear treat bags tied with colorful ribbons for party favors. You might also try serving them nestled in mini cupcake liners lined with crinkly parchment for a charming display.
Make Ahead and Storage
Storing Leftovers
Keep any leftover Twix Cookie Cups Recipe in an airtight container at room temperature for up to five days. This keeps them soft and preserves that perfect balance of chewy caramel and melty chocolate.
Freezing
If you want to enjoy these treats later, freeze them in a single layer on a baking sheet before transferring to a sealed freezer bag or container. They’ll keep well for up to two months and thaw beautifully without losing their signature texture.
Reheating
To bring back that freshly-baked warmth, pop the cookie cups in a preheated oven at 300°F for about 5 minutes or microwave briefly in 10-second bursts. Be careful not to overheat, as the caramel could melt too much and get messy.
FAQs
Can I use dark or semisweet chocolate instead of milk chocolate in this Twix Cookie Cups Recipe?
Absolutely! Using dark or semisweet chocolate adds a richer, slightly less sweet contrast that pairs wonderfully with the caramel and cookie base. Feel free to experiment to find your perfect balance.
Is it possible to make this recipe without caramel candies?
If you don’t have caramel candies, you can substitute with homemade caramel sauce that’s thickened to a similar consistency. Just make sure the sauce isn’t too runny so it holds in the cookie wells without spilling.
Can I make the cookie dough ahead of time?
Yes! The dough can be prepared and refrigerated for up to 24 hours before baking. This actually helps the flavors deepen and improves the texture of the cookie cups.
What do I do if my caramel or chocolate layer cracks after cooling?
If the top layer cracks, gently warming the cookie cups and lightly smoothing over with melted chocolate can patch it up. Alternatively, a quick drizzle of additional melted chocolate will disguise imperfections beautifully.
Are Twix Cookie Cups Recipe gluten-free friendly?
This recipe uses all-purpose flour, which contains gluten. For a gluten-free version, you will need to substitute with a gluten-free flour blend designed for baking, but results may vary slightly in texture.
Final Thoughts
Making the Twix Cookie Cups Recipe is like crafting little bites of happiness that bring together the nostalgic joy of your favorite candy with the homemade warmth of freshly baked cookies. They are absolutely perfect for impressing guests or treating yourself to something special anytime. Trust me, once you try them, these cookie cups will become a beloved staple in your baking repertoire. So grab your ingredients, get baking, and enjoy every delicious moment!
Print
Twix Cookie Cups Recipe
- Total Time: 32 minutes
- Yield: 24 cookie cups 1x
- Diet: Vegetarian
Description
Twix Cookie Cups are delightful bite-sized treats featuring a buttery cookie base filled with smooth caramel and topped with rich milk chocolate. Perfect for dessert lovers craving a homemade version of the classic candy bar in a fun mini muffin form.
Ingredients
Dry Ingredients
- 1 ¼ cups all-purpose flour
- ½ teaspoon baking powder
- ¼ teaspoon salt
Wet Ingredients
- ½ cup unsalted butter, softened
- ½ cup granulated sugar
- 1 large egg
- 1 teaspoon vanilla extract
Fillings and Toppings
- 18 soft caramels, unwrapped
- 2 tablespoons heavy cream
- ½ cup milk chocolate chips
Instructions
- Preheat and Prepare: Preheat your oven to 350°F (175°C) and lightly grease a mini muffin pan to prevent sticking.
- Mix Dry Ingredients: In a medium bowl, whisk together the flour, baking powder, and salt until evenly combined.
- Cream Butter and Sugar: In a large mixing bowl, use a mixer to cream the softened butter and granulated sugar until the mixture is light and fluffy, which usually takes about 3-4 minutes.
- Add Egg and Vanilla: Beat in the egg and vanilla extract until the mixture is smooth and fully incorporated.
- Combine Dry and Wet Mixtures: Gradually add the dry ingredient mixture to the wet ingredients, mixing just until combined to form the cookie dough.
- Shape Dough Balls: Roll the dough into 1-inch balls and place each ball into the prepared mini muffin tin, spacing evenly.
- Create Wells: Use your thumb or the back of a spoon to gently press down the center of each dough ball to create a small well, which will hold the caramel filling.
- Bake Cookies: Bake in the preheated oven for 10–12 minutes, or until the edges are golden and the centers remain slightly soft. If the wells shrink during baking, reshape them carefully with the back of a spoon right after removing from the oven.
- Melt Caramel Filling: While the cookie cups cool slightly, melt the unwrapped caramels and heavy cream together in a microwave-safe bowl using 30-second intervals, stirring in between, until smooth and pourable.
- Fill Cookie Cups: Spoon the melted caramel gently into each cookie well, filling about three-quarters full. Allow to set for 5–10 minutes to firm up.
- Melt Chocolate Topping: Melt the milk chocolate chips in the microwave in 20-second bursts, stirring until smooth and fully melted.
- Top with Chocolate: Spoon or drizzle the melted chocolate over the caramel layer to cover the tops of the cookie cups.
- Cool Completely: Let the cookie cups cool completely at room temperature until the chocolate has set. Once hardened, carefully remove the cookie cups from the muffin pan and serve.
Notes
- For easier cleanup, use mini muffin liners in your pan.
- Store the cookie cups in an airtight container at room temperature for up to 5 days.
- You can substitute dark or semisweet chocolate for milk chocolate for a richer flavor variation.
- Prep Time: 20 minutes
- Cook Time: 12 minutes
- Category: Dessert
- Method: Baking
- Cuisine: American
