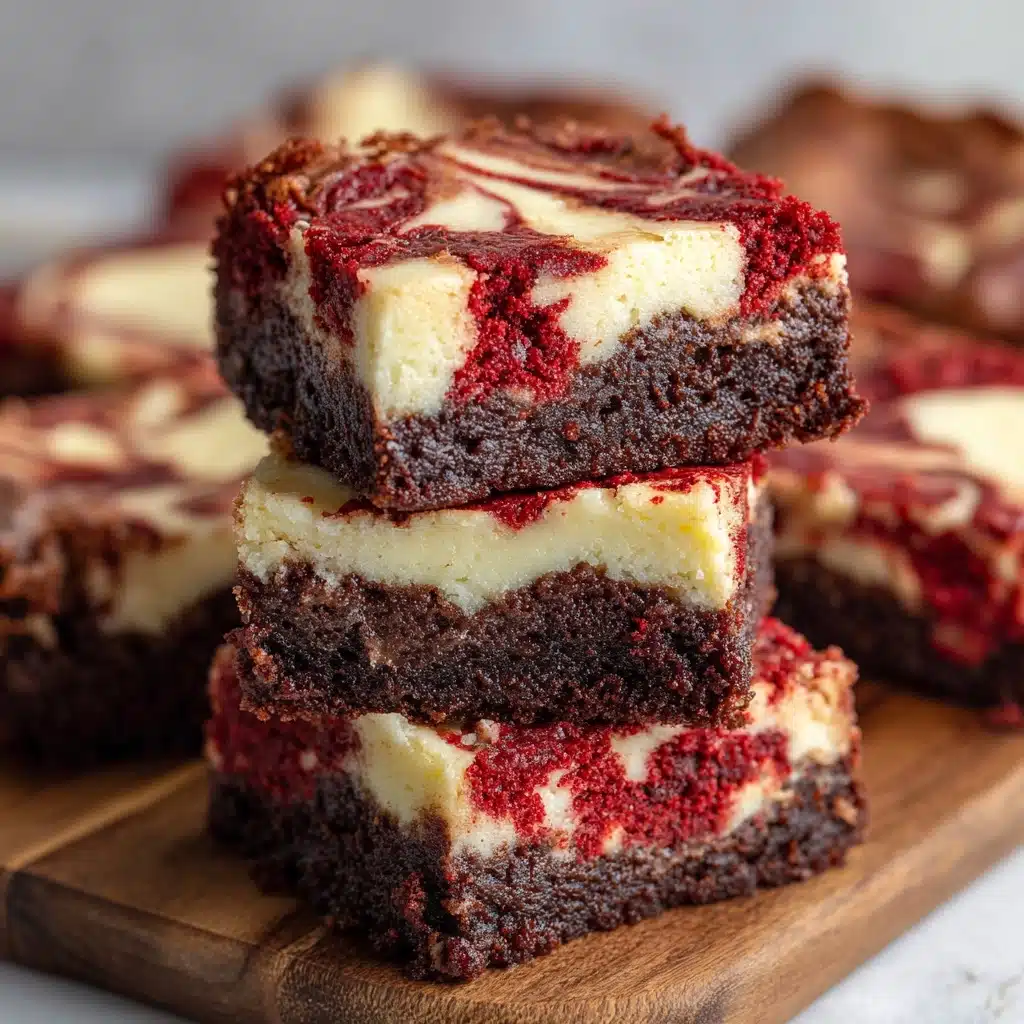
Red Velvet Brownies Recipe
If you’re looking for a show-stopping treat that’s as gorgeous as it is delicious, Red Velvet Brownies are here to steal the spotlight! Imagine the rich, cocoa-kissed flavor of classic red velvet cake, but with an irresistibly fudgy, chewy brownie texture. This colorful dessert is a dream come true for chocolate lovers and anyone with a soft spot for cream cheese frosting. Whether you’re baking for a special occasion or just because, Red Velvet Brownies deliver a stunning pop of color and a decadent bite that will have everyone reaching for seconds.
Ingredients You’ll Need
The magic of Red Velvet Brownies lies in a handful of pantry staples, each one playing an important role in creating the signature color, texture, and flavor. Don’t skip or substitute these — together, they make the brownies unforgettable!
- Unsalted butter, melted: This is the key to that rich, fudgy texture we all crave in brownies.
- Granulated sugar: Sweetens the brownies and helps create a shiny, crackly top.
- Large eggs: Eggs bind everything together and give the brownies structure and chewiness.
- Vanilla extract: Adds warmth and depth to balance out the cocoa and sweetness.
- Red food coloring: Brings that iconic, bold red hue that makes red velvet so enticing.
- Unsweetened cocoa powder: For that hint of chocolate that sets red velvet apart from plain brownies.
- All-purpose flour: Provides structure without making the brownies cakey.
- Salt: Enhances the flavors and keeps the sweetness in check.
- White vinegar: Reacts with the cocoa and adds a subtle tang, staying true to classic red velvet.
- White chocolate chips (optional): For creamy, sweet bursts in every bite.
- Cream cheese frosting (optional): The ultimate finishing touch for that classic red velvet pairing.
How to Make Red Velvet Brownies
Step 1: Prepare Your Pan and Preheat
Begin by preheating your oven to 350°F (175°C). Line an 8×8-inch baking pan with parchment paper or give it a light greasing. This step ensures you can lift the brownies out easily for perfect, picture-worthy squares later on.
Step 2: Mix the Wet Ingredients
In a large bowl, whisk together the melted butter and granulated sugar until the mixture is smooth and glossy. This helps dissolve the sugar and gives the brownies their signature texture.
Step 3: Add Eggs, Vanilla, and Color
Next, add the eggs, vanilla extract, red food coloring, and white vinegar. Whisk until everything is well combined and the batter turns a vibrant red. Don’t be shy with the food coloring — you want that bold, beautiful color to shine through!
Step 4: Incorporate the Dry Ingredients
Sift in the unsweetened cocoa powder, all-purpose flour, and salt. Stir gently until just combined, being careful not to overmix. This keeps your Red Velvet Brownies tender and fudgy instead of dense.
Step 5: Add White Chocolate Chips (Optional)
If you’re using them, fold in the white chocolate chips now. They add creamy, melty pockets of sweetness that perfectly complement the tangy red velvet flavor.
Step 6: Bake to Perfection
Pour the luscious batter into your prepared pan and spread it evenly. Bake for 25 to 30 minutes, or until a toothpick inserted near the center comes out with just a few moist crumbs. Don’t overbake — you want that fudgy center!
Step 7: Cool and Frost
Let the brownies cool completely in the pan. If you’re feeling extra indulgent, spread a layer of cream cheese frosting on top before slicing into squares. This final touch takes your Red Velvet Brownies to bakery-worthy status!
How to Serve Red Velvet Brownies

Garnishes
Dress up your brownies with a dusting of powdered sugar, a drizzle of melted white chocolate, or a generous swirl of cream cheese frosting. A few fresh berries or a sprinkle of red velvet cake crumbs can add a festive, elegant flair.
Side Dishes
Serve your Red Velvet Brownies with a scoop of vanilla ice cream for a classic combo, or pair them with fresh strawberries for a bright, refreshing contrast. A tall glass of cold milk or a steamy cup of coffee never hurts, either!
Creative Ways to Present
Cut the brownies into hearts or other fun shapes for special occasions, stack them on a tiered platter, or wrap them individually for party favors. You can even layer cubes of Red Velvet Brownies in parfait glasses with whipped cream and berries for a stunning dessert trifle.
Make Ahead and Storage
Storing Leftovers
Keep any leftover brownies in an airtight container at room temperature for up to three days. This keeps them moist and chewy — just the way you want them!
Freezing
Red Velvet Brownies freeze beautifully. Wrap individual squares tightly in plastic wrap and store them in a freezer-safe bag or container for up to two months. Thaw at room temperature whenever the craving strikes.
Reheating
If you like your brownies a little warm, just pop one in the microwave for 10 to 15 seconds. The chocolate chips will get melty, and the brownie will taste like it just came out of the oven!
FAQs
Can I use natural cocoa powder instead of Dutch-processed?
Yes, you can use either, but natural cocoa gives a slightly lighter flavor and works well with the vinegar for that classic red velvet tang. Dutch-processed cocoa will make the brownies richer and darker in color.
What’s the best way to get clean, sharp brownie squares?
Let your Red Velvet Brownies cool completely before slicing, and use a sharp knife wiped clean between each cut. For extra-neat edges, chill the brownies in the fridge for 30 minutes before cutting.
Can I double this recipe for a larger batch?
Absolutely! Double the ingredients and use a 9×13-inch pan. Watch the baking time — it may take an extra 5–10 minutes, so check for doneness with a toothpick.
Is there a substitute for red food coloring?
If you prefer a natural option, you can try beetroot powder, but the color will be more muted. The classic bright red comes from liquid or gel food coloring.
Can I make Red Velvet Brownies gluten-free?
Yes! Substitute your favorite 1:1 gluten-free flour blend for the all-purpose flour. The texture will still be dense and fudgy, so everyone can enjoy a slice.
Final Thoughts
Red Velvet Brownies are a true celebration in every bite — perfect for holidays, birthdays, or any time you need a little culinary magic. Don’t wait for a special occasion; treat yourself and share the love with family and friends. You’ll be amazed at how quickly these brownies become a new favorite!
Print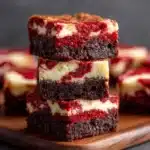
Red Velvet Brownies Recipe
- Total Time: 40 minutes
- Yield: 9 brownies 1x
- Diet: Vegetarian
Description
Deliciously moist and rich red velvet brownies combining classic cocoa flavor with a vibrant red hue, perfect for holidays or a special treat. These brownies feature a soft texture, optional white chocolate chips for added sweetness, and a creamy cream cheese frosting topping for an indulgent finish.
Ingredients
Brownie Batter
- 1/2 cup unsalted butter, melted
- 1 cup granulated sugar
- 2 large eggs
- 1 teaspoon vanilla extract
- 1 tablespoon red food coloring
- 1/4 cup unsweetened cocoa powder
- 3/4 cup all-purpose flour
- 1/4 teaspoon salt
- 1/2 teaspoon white vinegar
- 1/2 cup white chocolate chips (optional)
Cream Cheese Frosting (optional)
- Cream cheese frosting, as needed for topping
Instructions
- Preheat oven: Preheat your oven to 350°F (175°C) and prepare an 8×8-inch baking pan by lining it with parchment paper or lightly greasing it to prevent sticking.
- Mix wet ingredients: In a large bowl, whisk together the melted butter and granulated sugar until smooth and well combined. Then add the eggs, vanilla extract, red food coloring, and white vinegar. Whisk thoroughly until the mixture is homogenous and vibrant in color.
- Add dry ingredients: Sift together the unsweetened cocoa powder, all-purpose flour, and salt to avoid any lumps. Gradually add the dry mixture to the wet ingredients and gently stir just until combined, taking care not to overmix to keep the brownies tender.
- Fold in chocolate chips: If using, gently fold in the white chocolate chips to distribute them evenly throughout the batter.
- Pour and spread: Pour the batter into the prepared baking pan and spread it evenly with a spatula to ensure even cooking.
- Bake: Place the pan in the oven and bake for 25 to 30 minutes, or until a toothpick inserted near the center comes out with only a few moist crumbs attached, indicating perfect doneness.
- Cool and frost: Allow the brownies to cool completely in the pan on a wire rack. Once cooled, optionally spread cream cheese frosting evenly over the top before slicing into 9 squares.
Notes
- Adjust the quantity of red food coloring to achieve your preferred shade of red.
- For a deeper chocolate flavor, substitute regular unsweetened cocoa powder with dark cocoa powder.
- Store the brownies in an airtight container at room temperature for up to 3 days to maintain freshness.
- To enhance presentation and flavor, consider chilling the frosted brownies briefly before serving.
- Prep Time: 10 minutes
- Cook Time: 30 minutes
- Category: Dessert
- Method: Baking
- Cuisine: American
Nutrition
- Serving Size: 1 brownie (approx. 2.5 x 2.5 inches)
- Calories: 240
- Sugar: 20g
- Sodium: 115mg
- Fat: 12g
- Saturated Fat: 7g
- Unsaturated Fat: 4g
- Trans Fat: 0g
- Carbohydrates: 30g
- Fiber: 1g
- Protein: 3g
- Cholesterol: 55mg


