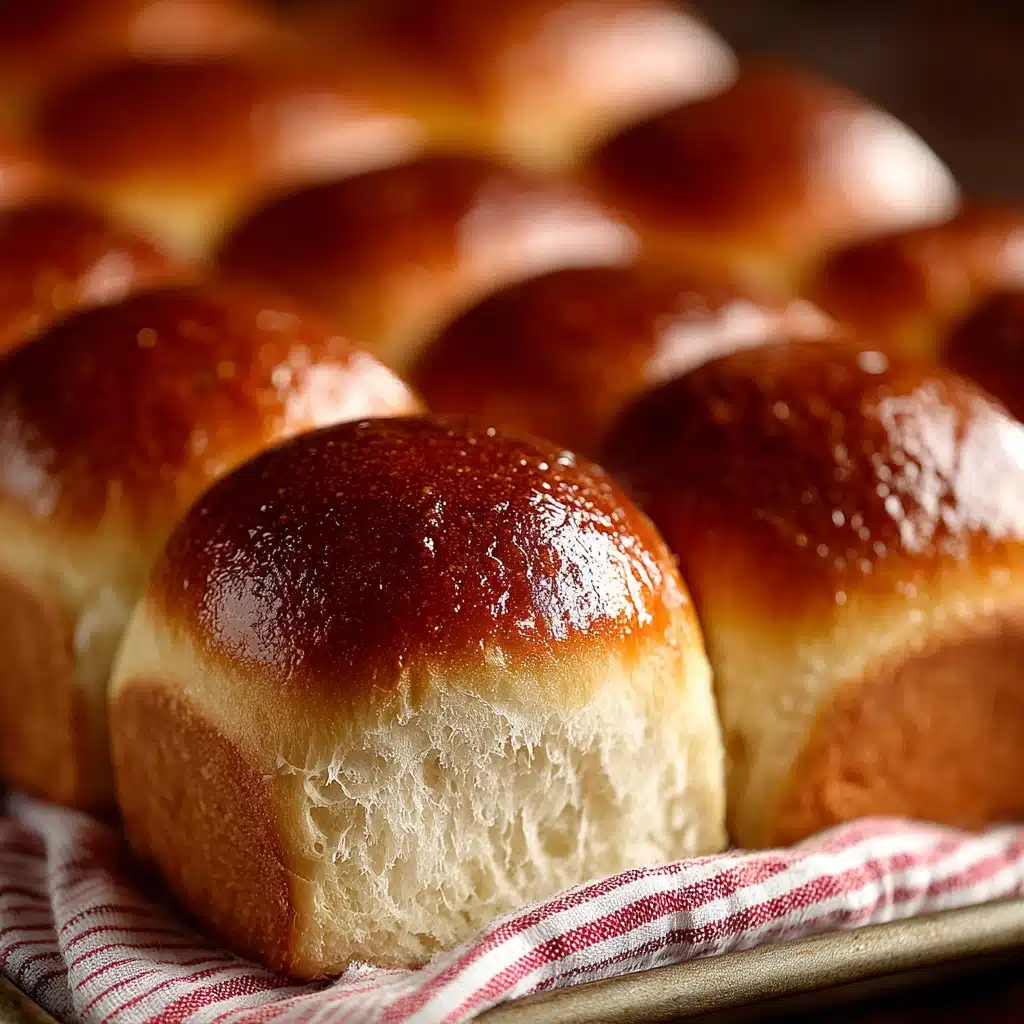
Old Fashioned Yeast Rolls Recipe
If you’re searching for a recipe that brings pure comfort to the table, look no further than these Old Fashioned Yeast Rolls. Pillowy soft, delicately sweet, and buttery to the core, these classic rolls are the kind of bread that make even a simple meal feel like a special occasion. Whether you’re building a holiday feast or just want to make a weekday dinner memorable, this recipe will fill your kitchen with irresistible aromas and your heart with nostalgia. Let’s dive into the magic behind these timeless rolls!
Ingredients You’ll Need
There’s something truly satisfying about how just a handful of humble ingredients, each carefully chosen, come together to create Old Fashioned Yeast Rolls. Every element in this recipe plays a crucial role, from the rich dairy to the aromatic yeast, ensuring that each bite is tender, flavorful, and golden-topped.
- Whole milk, warmed (1 cup): Adds richness and helps create that soft, tender crumb we love in yeast rolls.
- Granulated sugar (1/4 cup): Feeds the yeast and brings just the right touch of sweetness.
- Active dry yeast (2 1/4 teaspoons/1 packet): The star ingredient that gives the rolls their signature lift and lightness.
- Unsalted butter, melted (1/4 cup + 1 tablespoon for brushing): Infuses the dough with buttery flavor and gives a luscious, shiny finish.
- Salt (1 teaspoon): Balances the sweetness and brings out the best in all the other flavors.
- Large egg, room temperature (1): Adds richness, color, and structure to the dough for a golden interior.
- All-purpose flour (3 to 3 1/2 cups, plus more for dusting): The sturdy backbone of the rolls, creating just the right texture.
How to Make Old Fashioned Yeast Rolls
Step 1: Activate the Yeast
Start by combining your warm milk and sugar in a large mixing bowl. Sprinkle the active dry yeast on top and let the mixture sit undisturbed for 5 to 10 minutes. Watching it become foamy is like a little kitchen science experiment—it means your yeast is ready to work its magic.
Step 2: Mix in Wet Ingredients
Once the yeast mixture is bubbly, stir in the melted butter, salt, and egg. This trio infuses the dough with richness, moisture, and a hint of color—setting the foundation for irresistibly tender Old Fashioned Yeast Rolls.
Step 3: Add the Flour
Gradually add the all-purpose flour, one cup at a time. Stir until the dough starts to come together and pulls away from the sides of the bowl. The dough should be soft, slightly tacky, but not too sticky. Adjust with a little extra flour if needed to get the right consistency.
Step 4: Knead the Dough
Turn your dough onto a floured surface and knead for 8 to 10 minutes. This is where the magic happens—kneading develops gluten, giving the rolls their signature chew and fluffiness. The dough should become smooth and elastic under your hands.
Step 5: First Rise
Place the kneaded dough in a greased bowl and cover it with a clean towel or plastic wrap. Let it rise in a warm spot for about an hour, or until it’s doubled in size. This slow rise is what builds those beautiful airy pockets inside each roll.
Step 6: Shape the Rolls
Punch down the risen dough to release excess air, then divide it into 12 equal pieces. Shape each piece into a smooth ball and arrange them in a greased 9×13-inch baking dish. This step is as satisfying as it is simple, and it’s when your Old Fashioned Yeast Rolls start taking their classic form.
Step 7: Second Rise
Cover the shaped rolls and let them rise again for 30 to 40 minutes, until they’re puffy and nearly doubled. This second rise gives the rolls their perfect height and a soft, cloud-like texture.
Step 8: Bake to Perfection
Preheat your oven to 375°F (190°C). Slide the pan of rolls into the oven and bake for 15 to 18 minutes, or until the tops are golden brown and your kitchen smells heavenly. Don’t wander too far—the transformation at this stage is pure magic!
Step 9: Brush with Butter
Right after removing the rolls from the oven, brush them generously with melted butter. This finishing touch adds shine, flavor, and that irresistible softness that makes Old Fashioned Yeast Rolls so memorable. Let them cool slightly before serving (if you can resist diving in right away!).
How to Serve Old Fashioned Yeast Rolls

Garnishes
Give your rolls an elegant finish with a light sprinkle of flaky sea salt or a dusting of chopped fresh herbs like parsley or chives. For a sweet touch, try a little honey butter or a swirl of cinnamon sugar melted into the tops.
Side Dishes
Old Fashioned Yeast Rolls are the ultimate companion to everything from hearty soups and stews to classic roast chicken or a holiday ham. They also shine alongside creamy mashed potatoes and green beans for a true comfort-food spread.
Creative Ways to Present
Try serving the rolls in a rustic bread basket lined with a linen napkin for a charming, homey look. For gatherings, arrange them in a wreath shape on a platter, or slice them in half to make irresistible mini sandwiches filled with leftover turkey, ham, or roasted veggies.
Make Ahead and Storage
Storing Leftovers
To keep your Old Fashioned Yeast Rolls fresh, store any leftovers in an airtight container or zip-top bag at room temperature for up to two days. They’ll stay soft and delicious, perfect for snacking or sandwich-making.
Freezing
These rolls freeze beautifully! Once cooled completely, place them in a freezer-safe bag and freeze for up to three months. Thaw at room temperature or gently warm in the oven for that just-baked taste any time you like.
Reheating
For best results, reheat Old Fashioned Yeast Rolls in a 300°F oven for about 8 to 10 minutes, wrapped loosely in foil to prevent drying out. A quick brush of melted butter after warming brings them right back to life.
FAQs
Can I use instant yeast instead of active dry yeast?
Yes, you can substitute instant yeast for active dry yeast in this recipe. Instant yeast doesn’t require proofing, so you can mix it directly with the dry ingredients, but I still recommend blooming it in the warm milk for the best texture and flavor.
What can I do if my dough isn’t rising?
If your dough isn’t rising, double-check that your milk wasn’t too hot or too cold when adding the yeast (about 110°F is ideal). Also, make sure your yeast is within its expiration date. Placing the dough in a slightly warm, draft-free spot can help it rise properly.
Can I make the dough ahead of time?
Absolutely! You can prepare the dough up to the first rise, then cover and refrigerate it overnight. Let it come to room temperature and finish shaping and rising before baking for fresh Old Fashioned Yeast Rolls with minimal fuss on busy days.
How do I get perfectly round rolls?
To achieve perfectly round rolls, gently tuck the edges of each dough piece under itself while shaping, creating a smooth, taut ball. Placing the rolls close together in the baking dish also helps them rise up, not out, for that classic look.
Are Old Fashioned Yeast Rolls suitable for vegetarians?
Yes, these rolls are naturally vegetarian—they’re made without any meat or meat-based products, relying on simple pantry staples for their incredible flavor and texture.
Final Thoughts
If there’s one bread recipe that deserves a permanent spot in your kitchen, it’s these Old Fashioned Yeast Rolls. They’re simple, nostalgic, and guaranteed to bring a smile to the faces gathered around your table. Give them a try, and let the comforting aroma and soft, buttery bite remind you why homemade bread is always worth it!
Print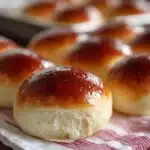
Old Fashioned Yeast Rolls Recipe
- Total Time: 2 hours
- Yield: 12 rolls 1x
- Diet: Vegetarian
Description
These Old Fashioned Yeast Rolls are soft, fluffy, and wonderfully buttery, perfect for accompanying any meal. Made from scratch with simple ingredients, they offer a classic homemade taste with a golden crust and tender crumb. Ideal for family dinners, holidays, or as a snack, these rolls can also be frozen and reheated for convenience.
Ingredients
Wet Ingredients
- 1 cup whole milk, warmed (about 110°F)
- 1/4 cup unsalted butter, melted
- 1 large egg, room temperature
- 1 tablespoon butter, melted (for brushing)
Dry Ingredients
- 1/4 cup granulated sugar
- 2 1/4 teaspoons active dry yeast (1 packet)
- 1 teaspoon salt
- 3 to 3 1/2 cups all-purpose flour, plus more for dusting
Instructions
- Activate Yeast: In a large mixing bowl, combine the warm milk and sugar, then sprinkle the yeast over the top. Let it sit for 5–10 minutes until the mixture is foamy, indicating the yeast is active and ready.
- Mix Dough: Stir in the melted butter, salt, and egg. Gradually add the flour, one cup at a time, mixing until a soft dough forms, ensuring it is not too sticky or too dry.
- Knead Dough: Knead the dough on a floured surface for 8–10 minutes until smooth and elastic, which helps develop the gluten for a fluffy texture.
- First Rise: Transfer the dough to a greased bowl, cover with a clean towel or plastic wrap, and let it rise in a warm place for 1 hour, or until doubled in size.
- Shape Rolls: Punch down the dough and divide it into 12 equal pieces. Shape each piece into a smooth ball and place in a greased 9×13-inch baking dish.
- Second Rise: Cover and let the rolls rise again for 30–40 minutes, or until puffy and nearly doubled in size.
- Preheat Oven: While the rolls are rising, preheat your oven to 375°F (190°C).
- Bake: Bake the rolls for 15–18 minutes, or until golden brown on top, ensuring they are cooked through but still soft inside.
- Brush with Butter: Remove the rolls from the oven and immediately brush with melted butter for a tender, flavorful crust.
- Cool and Serve: Let the rolls cool slightly before serving. Enjoy warm for the best taste and texture.
Notes
- For an extra buttery flavor, brush the rolls with butter both before and after baking.
- These rolls freeze well—store them in an airtight container, and gently reheat in the oven before serving.
- If you prefer sweeter rolls, increase sugar by 1-2 tablespoons.
- Make sure the milk is not too hot when activating yeast, as temperatures above 120°F can kill the yeast.
- Prep Time: 20 minutes
- Cook Time: 18 minutes
- Category: Bread
- Method: Baking
- Cuisine: American
Nutrition
- Serving Size: 1 roll
- Calories: 180
- Sugar: 4g
- Sodium: 160mg
- Fat: 6g
- Saturated Fat: 3.5g
- Unsaturated Fat: 2g
- Trans Fat: 0g
- Carbohydrates: 27g
- Fiber: 1g
- Protein: 4g
- Cholesterol: 25mg


