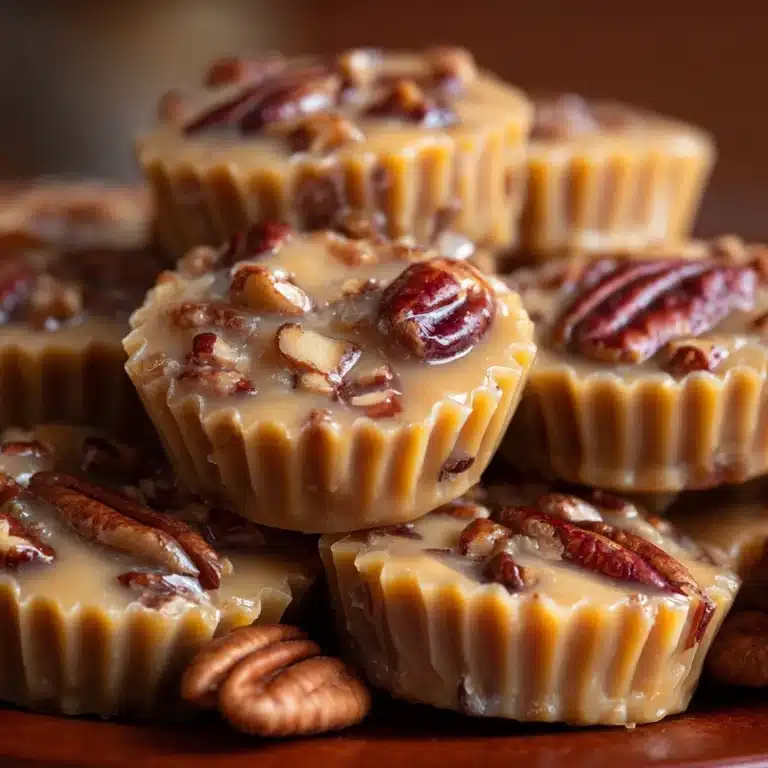
Irresistible Peanut Butter Balls Recipe
Get ready to fall in love with this Irresistible Peanut Butter Balls Recipe that brings together the creamy richness of peanut butter and the smooth sweetness of chocolate into one perfect bite. Each ball melts in your mouth, delivering that classic flavor combo with a delightful texture that’s both soft inside and elegantly coated outside. Whether you’re making these for a party, a cozy night in, or just because peanut butter cravings hit, this recipe is simple yet incredibly rewarding. Trust me, once you try it, these peanut butter balls will become a staple in your dessert rotation!

Ingredients You’ll Need
The beauty of this Irresistible Peanut Butter Balls Recipe lies in its simplicity — just a handful of basic ingredients that come together for a rich, creamy, and satisfyingly sweet treat. Every component plays a crucial role in balancing taste, texture, and that melt-in-your-mouth experience.
- 1 cup creamy peanut butter: The star ingredient, providing smooth, nutty flavor and creamy texture.
- 6 tablespoons salted butter: Adds richness and helps create a silky dough; use unsalted plus a pinch of salt if preferred.
- 2 3/4 cups powdered sugar: Sweetens the mixture while giving the peanut butter balls their perfect firmness.
- 1 teaspoon vanilla extract: Enhances depth of flavor with a warm, aromatic note.
- 1 package (10 ounces) chocolate melting chocolate: The decadent coating that adds a luscious, glossy finish and a satisfying snap.
How to Make Irresistible Peanut Butter Balls Recipe
Step 1: Cream the Butter and Peanut Butter
Start by combining the softened butter and creamy peanut butter in a mixing bowl. Using a hand mixer, blend them together until the mixture is smooth and well incorporated. This step builds the foundation for that irresistibly creamy texture that will melt in your mouth.
Step 2: Add Powdered Sugar and Vanilla
Next, gradually stir in the powdered sugar. This ensures the mixture thickens to the right consistency without becoming grainy. Finally, add the vanilla extract and mix until your dough looks smooth and uniform — a sweet, aromatic, and velvety base for the peanut butter balls.
Step 3: Prepare Your Baking Sheet
Line a large cookie sheet with wax or parchment paper. This simple step is essential to prevent sticking later on when you set the balls after coating them with chocolate.
Step 4: Shape and Chill the Peanut Butter Balls
Scoop out 1-inch portions of your peanut butter mixture and roll each one between your hands to form a smooth ball. Place the balls evenly spaced on the lined cookie sheet. Pop them into the refrigerator for about 20 minutes. Chilling helps them firm up, making it easier to dip them in chocolate without losing their shape.
Step 5: Melt the Chocolate Coating
While the peanut butter balls chill, melt your chocolate melting wafers. Do this in a microwave-safe bowl, heating in short bursts and stirring frequently to achieve a glossy, silky consistency. Alternatively, follow the package directions — smooth melted chocolate is key for a beautiful, even coating.
Step 6: Dip and Coat the Peanut Butter Balls
Using a toothpick, gently dip each peanut butter ball into the melted chocolate, making sure it’s fully covered. Lift and let excess chocolate drip back into the bowl, then place the coated ball back on the lined cookie sheet. This process might be a little messy but so worth it for that perfect chocolate shell.
Step 7: Set and Enjoy
Allow the chocolate to harden either at room temperature or in the fridge until it cracks with a satisfying snap. Once set, these irresistible peanut butter balls are ready to share — or keep close for your own secret stash!
How to Serve Irresistible Peanut Butter Balls Recipe

Garnishes
Want to add a pop of color or texture? Sprinkle finely chopped peanuts, sea salt flakes, or even a dusting of cocoa powder on the chocolate before it hardens. These simple garnishes elevate the presentation and add exciting flavor contrasts without much effort.
Side Dishes
These peanut butter balls shine as finger-friendly treats alongside fresh fruit platters, crunchy veggie sticks, or a cup of lively coffee or cold milk. They balance beautifully with both fresh and savory sides, making them perfect for any gathering or casual snack time.
Creative Ways to Present
Package them in small decorative boxes or cellophane bags tied with colorful ribbons to gift friends and family. You could also arrange them on a tiered dessert stand for parties — they’ll instantly become the centerpiece everyone reaches for first!
Make Ahead and Storage
Storing Leftovers
Keep your peanut butter balls fresh by storing them in an airtight container in the refrigerator. They stay perfect for up to five days, retaining that divine chocolate shell and creamy center, so you can enjoy them over several days without losing any magic.
Freezing
For longer storage, freeze the peanut butter balls in a single layer on a baking sheet first, then transfer to a freezer-safe container. Frozen, they keep well for up to 3 months. When you’re ready to enjoy, just thaw them in the fridge overnight to retain the best texture.
Reheating
No need to reheat these — they are just perfect chilled. However, if you prefer them slightly softer, allow them to sit at room temperature for 10 to 15 minutes before serving to bring out the fullest peanut buttery richness.
FAQs
Can I use crunchy peanut butter instead of creamy?
Absolutely! Using crunchy peanut butter will add a delightful crunch to every bite, which many people enjoy. Just be aware it may slightly change the texture of your peanut butter balls.
What if I don’t have chocolate melting wafers?
You can substitute with any good quality chocolate chips or bars. To help it melt smoothly, add a small amount of coconut oil or vegetable shortening and melt gently to achieve that perfect coating consistency.
Are these peanut butter balls gluten-free?
Yes! All the ingredients in this Irresistible Peanut Butter Balls Recipe are naturally gluten-free, making it a safe and delicious treat for anyone with gluten sensitivities.
How do I make the chocolate coating shiny and smooth?
Melting chocolate slowly and stirring frequently helps achieve that glossy finish. Using a microwave in short increments or melting over a double boiler prevents burning and creates a smooth, shiny coating.
Can I add other flavors or mix-ins?
Definitely! Feel free to experiment by adding mini chocolate chips, crushed pretzels, or a touch of cinnamon to the peanut butter mixture for your own special twist on this classic recipe.
Final Thoughts
If you’re looking for a simple yet show-stopping treat that’s guaranteed to satisfy your peanut butter cravings, this Irresistible Peanut Butter Balls Recipe is your new best friend in the kitchen. With just a few pantry staples, you’ll create little bites of joy that everyone will adore — so don’t wait, grab your ingredients and make a batch today!
Print
Irresistible Peanut Butter Balls Recipe
- Total Time: 35 minutes
- Yield: 36 servings 1x
Description
These irresistible peanut butter balls are a perfect no-bake treat combining creamy peanut butter and sweet powdered sugar, coated in rich melted chocolate. Easy to make and perfect for any occasion, these bite-sized delights offer a harmonious blend of flavors and textures that will satisfy any sweet tooth.
Ingredients
Main Ingredients
- 1 cup (283g) creamy peanut butter
- 6 tablespoons (84g) salted butter (or unsalted butter + 1/4 teaspoon salt)
- 2 3/4 cups (311g) powdered sugar
- 1 teaspoon vanilla extract
For the Coating
- 1 package (10 ounces) chocolate melting chocolate (such as Ghirardelli or Candiquik)
Instructions
- Cream Butter & Peanut Butter: In a mixing bowl, use a hand mixer to cream together the peanut butter and butter until smooth and well blended, creating a creamy base for your peanut butter balls.
- Add Sugar & Vanilla: Gradually add the powdered sugar to the creamed mixture, mixing thoroughly until well combined. Then stir in the vanilla extract until the mixture is smooth and cohesive.
- Prepare Baking Sheet: Line a large cookie sheet with wax paper or parchment paper to prevent the peanut butter balls from sticking during chilling and coating.
- Shape Balls: Scoop out 1-inch portions of the peanut butter mixture and roll each into a ball using your hands. Place each formed ball onto the prepared cookie sheet. Repeat until all the mixture is used.
- Chill: Refrigerate the peanut butter balls for about 20 minutes or until they become firm, which will make them easier to dip into chocolate.
- Melt Chocolate: Place the chocolate melting wafers in a microwave-safe bowl and microwave for 30 seconds, then stir. If not fully melted, microwave for additional 10-second intervals, stirring between each, until the chocolate is smooth and fully melted. Alternatively, follow package instructions.
- Coat with Chocolate: Remove the peanut butter balls from the fridge. Using a toothpick, dip each ball into the melted chocolate, fully coating it. Place the coated balls back onto the lined cookie sheet.
- Set & Serve: Allow the chocolate-coated balls to harden completely at room temperature or in the refrigerator. Serve once set, or store in an airtight container in the fridge for up to 5 days.
Notes
- For best results, use creamy peanut butter for a smooth texture.
- You can substitute salted butter with unsalted butter plus 1/4 teaspoon salt if preferred.
- Chill the balls thoroughly before dipping to prevent them from breaking apart.
- If you don’t have chocolate melting wafers, high-quality chocolate chips or bars can be used instead.
- Store peanut butter balls in an airtight container in the refrigerator to maintain freshness.
- Prep Time: 15 minutes
- Cook Time: 0 minutes
- Category: Dessert
- Method: No-Cook
- Cuisine: American


