Holiday-Inspired Poke Cake Recipe
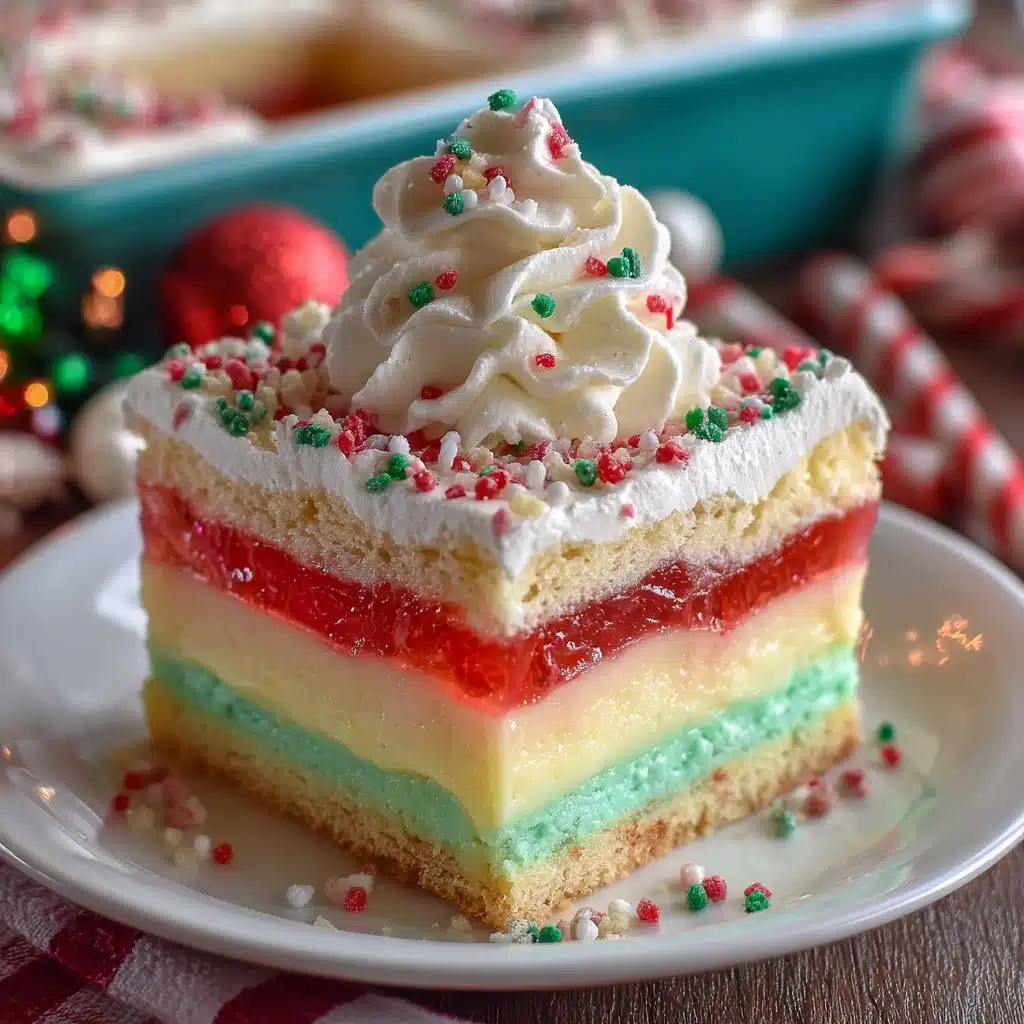
If you’re searching for a dessert that’s as eye-catching as it is easy, this Holiday-Inspired Poke Cake is your new go-to for festive gatherings. With its vibrant red and green stripes running through a fluffy white cake, it brings instant cheer to any table—plus, the creamy whipped topping and playful sprinkles make every bite pure joy. Whether you’re hosting a holiday party or simply craving something sweet and special, this cake is a guaranteed crowd-pleaser that looks like a celebration on a plate.
Ingredients You’ll Need
What makes this Holiday-Inspired Poke Cake so magical is how simple but essential each ingredient is—the cake, gelatin, and toppings all work together to create irresistible flavor, texture, and color. Here’s what you’ll need and why each matters:
- White Cake Mix: The perfect blank canvas for letting those holiday colors and flavors shine through.
- Eggs, Oil, Water: These basics (as called for on your cake mix box) ensure a moist, tender cake every time.
- Red Gelatin (3 oz, like cherry or strawberry): Adds a sweet, fruity burst of flavor and a vivid stripe of holiday red.
- Green Gelatin (3 oz, like lime): Brings a zesty contrast and that classic festive green everyone loves.
- Boiling Water (2 cups, divided): Essential for dissolving the gelatin completely and setting those bright colors.
- Cold Water (1 cup, divided): Helps the gelatin cool before being poured into the cake, so it sets up just right.
- Whipped Topping (8 oz): Creamy, fluffy, and super easy to spread—the perfect snowy finish for your cake.
- Holiday Sprinkles: The ultimate festive touch! Choose your favorites to make your cake merry and bright.
How to Make Holiday-Inspired Poke Cake
Step 1: Bake the Cake
Start by preheating your oven and preparing the white cake mix according to the package instructions, using a 9×13-inch baking dish. Once mixed, pour the batter in and bake until a toothpick inserted into the center comes out clean. This step is all about creating a perfectly tender base that will soak up every bit of that colorful gelatin goodness.
Step 2: Cool and Poke
Let the cake cool for about 15 minutes after baking—it should still be warm but not hot. Using the handle of a wooden spoon, poke holes all over the cake, spacing them about an inch apart. These little wells are what allow the gelatin to seep deep into the cake, creating those gorgeous, festive stripes inside every slice.
Step 3: Prepare the Gelatin
In two separate bowls, dissolve each gelatin flavor in 1 cup of boiling water. Stir each until completely dissolved, then add 1/2 cup of cold water to each bowl. This step ensures your gelatin is smooth, vibrant, and ready to infuse the cake with both color and flavor.
Step 4: Pour the Gelatin
With a steady hand (and maybe a spoon for guidance), carefully pour the red gelatin over half the holes and the green gelatin over the other half. Don’t worry if the colors mix a little—it just adds to the festive look! Take your time to make sure each hole gets filled for the best stripe effect.
Step 5: Chill the Cake
Cover the cake and refrigerate for at least 4 hours or overnight. This gives the gelatin plenty of time to set up inside the cake, making those stripes extra bold and the texture wonderfully moist. Trust me, the wait is worth it!
Step 6: Frost and Decorate
When you’re ready to serve, spread the whipped topping evenly over the chilled cake. Top it off with holiday sprinkles (and maybe even a few crushed candy canes if you’re feeling extra festive) for that irresistible holiday sparkle. Now your Holiday-Inspired Poke Cake is ready to wow everyone at your table!
How to Serve Holiday-Inspired Poke Cake

Garnishes
A generous layer of whipped topping and a flurry of holiday sprinkles are classic, but you can get even more creative—try a drizzle of white chocolate, a scattering of crushed peppermint candies, or even a dusting of edible glitter for extra holiday magic. The finishing touches make every slice feel like a mini celebration.
Side Dishes
This cake pairs beautifully with a mug of hot cocoa, a scoop of vanilla ice cream, or a platter of fresh berries. For a true holiday spread, serve it alongside spiced nuts, mulled cider, or a festive fruit salad to balance out the sweetness.
Creative Ways to Present
If you want to really impress, cut the cake into small squares and arrange them on a tiered dessert stand, or serve slices in festive cupcake liners for grab-and-go treats. You can even use cookie cutters to create fun shapes—think stars or trees—for a playful twist on the classic Holiday-Inspired Poke Cake.
Make Ahead and Storage
Storing Leftovers
Store any leftover Holiday-Inspired Poke Cake in the refrigerator, well covered, for up to 3 days. The gelatin keeps the cake moist, and the whipped topping stays fluffy—just be sure to keep it chilled so everything stays fresh and delicious.
Freezing
To freeze, wrap the unfrosted cake tightly in plastic wrap and foil, then freeze for up to 2 months. Thaw overnight in the fridge before adding whipped topping and sprinkles so you still get that creamy, cloud-like finish.
Reheating
This cake is best served cold or at room temperature, so no reheating is needed. If you’ve stored it in the fridge, just let it sit out for a few minutes before serving to take the chill off and make those flavors pop.
FAQs
Can I use homemade whipped cream instead of store-bought topping?
Absolutely! Homemade whipped cream adds a rich, fresh flavor that’s hard to beat. Just whip up 2 cups of heavy cream with a bit of powdered sugar and vanilla until soft peaks form, then spread it over your chilled Holiday-Inspired Poke Cake before serving.
Do I have to use both red and green gelatin?
While the red and green combo gives it that unmistakable holiday look, you can absolutely customize the colors to fit other occasions—think orange and purple for Halloween or pastel shades for spring celebrations.
Can I make this cake ahead of time?
Yes! In fact, the Holiday-Inspired Poke Cake is even better when made a day ahead, giving the gelatin plenty of time to set and the flavors to meld. Just add the whipped topping and sprinkles right before serving for the freshest presentation.
What’s the best way to get clean slices?
For neat, beautiful slices, use a sharp knife wiped clean between cuts. Chilling the cake thoroughly also helps the gelatin set firmly, making it easier to cut and serve without smudging the colors.
Can I make this recipe gluten-free?
Definitely! Simply use your favorite gluten-free white cake mix and double-check that your gelatin and toppings are gluten-free. The technique and festive fun stay exactly the same.
Final Thoughts
This Holiday-Inspired Poke Cake is pure festive fun—easy to make, gorgeous to serve, and so delicious that it’ll disappear from your dessert table in no time. Give it a try this season and watch everyone’s eyes light up with every colorful, creamy slice!
Print
Holiday-Inspired Poke Cake Recipe
- Total Time: 4 hours 50 minutes
- Yield: 12 servings 1x
- Diet: Non-Vegetarian
Description
This festive Holiday-Inspired Poke Cake combines a moist white cake base with vibrant red and green gelatin flavors, perfect for celebrating the season. The cake is poked and filled with cherry and lime gelatin, then topped with creamy whipped topping and colorful holiday sprinkles for a visually stunning and delicious dessert that’s easy to prepare.
Ingredients
Cake Ingredients
- 1 box white cake mix (plus ingredients listed on the box: eggs, oil, water)
Gelatin Ingredients
- 1 package (3 oz) red gelatin (like cherry or strawberry)
- 1 package (3 oz) green gelatin (like lime)
- 2 cups boiling water (1 cup per gelatin flavor)
- 1 cup cold water (1/2 cup per gelatin flavor)
Topping and Garnish
- 1 container (8 oz) whipped topping (such as Cool Whip)
- Holiday sprinkles for garnish
Instructions
- Prepare the Cake: Preheat your oven according to the white cake mix package instructions. Prepare the cake batter following the box directions, including the eggs, oil, and water. Pour the batter into a greased 9×13-inch baking dish and bake until a toothpick inserted in the center comes out clean, about 30 minutes. Allow the cake to cool for 15 minutes.
- Make the Gelatin: In two separate bowls, dissolve the red gelatin in 1 cup boiling water and the green gelatin in another 1 cup boiling water. Stir until completely dissolved. Add 1/2 cup cold water to each bowl and stir again.
- Poke the Cake: Using the handle of a wooden spoon, poke holes all over the warm cake approximately 1 inch apart to allow the gelatin to seep into the cake.
- Pour the Gelatin: Carefully spoon the red gelatin mixture over half of the holes, and the green gelatin mixture over the remaining holes. Use a spoon to guide the gelatin into the holes without spilling over the cake surface.
- Chill the Cake: Cover the cake with plastic wrap and refrigerate for at least 4 hours or overnight so the gelatin sets firmly inside the cake.
- Add Topping and Garnish: Once chilled, spread the whipped topping evenly over the top of the cake. Sprinkle holiday-themed sprinkles on top for a festive finish. Slice and serve chilled.
Notes
- You can use homemade whipped cream instead of store-bought whipped topping for a fresher taste.
- For a peppermint twist, sprinkle crushed candy canes on top along with the holiday sprinkles.
- Best made a day ahead to allow the gelatin to fully set and flavors to meld.
- Prep Time: 20 minutes
- Cook Time: 30 minutes
- Category: Dessert
- Method: Baking
- Cuisine: American
Nutrition
- Serving Size: 1 slice
- Calories: 220
- Sugar: 22g
- Sodium: 210mg
- Fat: 7g
- Saturated Fat: 2g
- Unsaturated Fat: 3g
- Trans Fat: 0g
- Carbohydrates: 36g
- Fiber: 0g
- Protein: 2g
- Cholesterol: 20mg


