Easy Butterfinger Balls Recipe
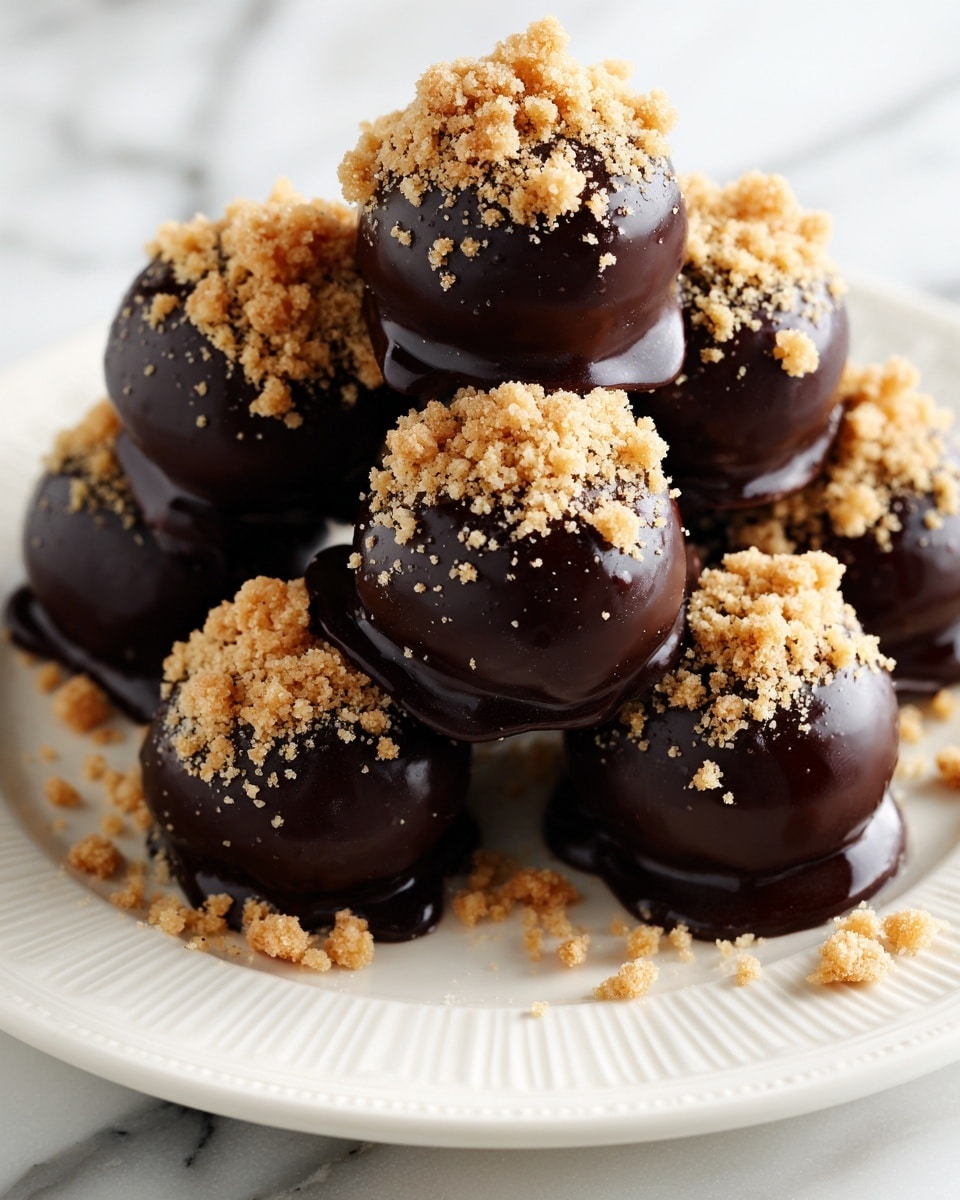
If you have a sweet tooth that’s always itching for a fun and indulgent treat, then get ready to fall in love with this Easy Butterfinger Balls Recipe. These little bites are everything you could want from a dessert: crunchy, creamy, chocolatey, and downright addictive. With just a handful of ingredients and straightforward steps, they come together perfectly for parties, holidays, or just a special treat anytime you want to feel like a dessert rockstar without the fuss. Trust me, once you taste these buttery candy-packed balls dipped in silky chocolate, they’ll quickly become a favorite in your recipe collection.
Ingredients You’ll Need
One of the best things about this Easy Butterfinger Balls Recipe is how simply delightful the ingredients are. Each one plays an essential role in crafting that perfect balance of creamy, crunchy, and sweet in every bite.
- 2 cups crushed Butterfinger candy bars: Adds the signature crispy, peanut-buttery crunch that makes these bites unforgettable.
- 1 (8-ounce) package cream cheese, softened: Brings creamy richness and helps bind all the ingredients together smoothly.
- 2 cups powdered sugar: Sweetens the mixture without graininess and gives a velvety texture.
- 1 teaspoon vanilla extract: Enhances the overall flavor with a warm, comforting note.
- 2 cups semi-sweet chocolate chips: Coats the balls in a luscious chocolate shell for that perfect finish.
- 1 tablespoon coconut oil or vegetable oil (optional): Makes the melted chocolate silky and easy to coat the balls evenly.
How to Make Easy Butterfinger Balls Recipe
Step 1: Prepare the Filling
Start by beating together the softened cream cheese, powdered sugar, and vanilla extract until the mixture is silky smooth. Then gently fold in the crushed Butterfinger candy bars, making sure the candy pieces are evenly distributed without breaking them down too much. You want that signature crunch in every bite!
Step 2: Form the Balls
Next, roll the mixture into 1-inch balls using your hands or a small cookie scoop to keep the sizes uniform. Place them carefully on a parchment-lined baking sheet to prevent sticking. Once all the balls are formed, pop them into the freezer for 30 minutes to firm up. This step helps them hold their shape when you dip them in chocolate later.
Step 3: Melt the Chocolate
While the balls chill, melt the semi-sweet chocolate chips in a microwave-safe bowl. Heat in 20-second bursts, stirring well between each interval to prevent scorching and achieve a smooth, glossy melt. If you want an extra silky coating, stir in a tablespoon of coconut oil or vegetable oil. This little trick makes dipping a breeze and produces a shiny finish.
Step 4: Coat the Balls
Time to get messy (in the best way possible)! Working quickly, dip each chilled Butterfinger ball into the melted chocolate, making sure it’s fully covered. Use a fork or dipping tool to lift the ball out and gently tap off any excess chocolate. Place the coated balls back on the parchment-lined tray to set.
Step 5: Chill and Serve
Pop the chocolate-coated Butterfinger balls in the refrigerator for 10 to 15 minutes until the chocolate hardens. Then, they’re ready to enjoy immediately or store away for later. These treats keep well in an airtight container in the fridge for up to a week, making them perfect for prepping ahead of your next get-together.
How to Serve Easy Butterfinger Balls Recipe
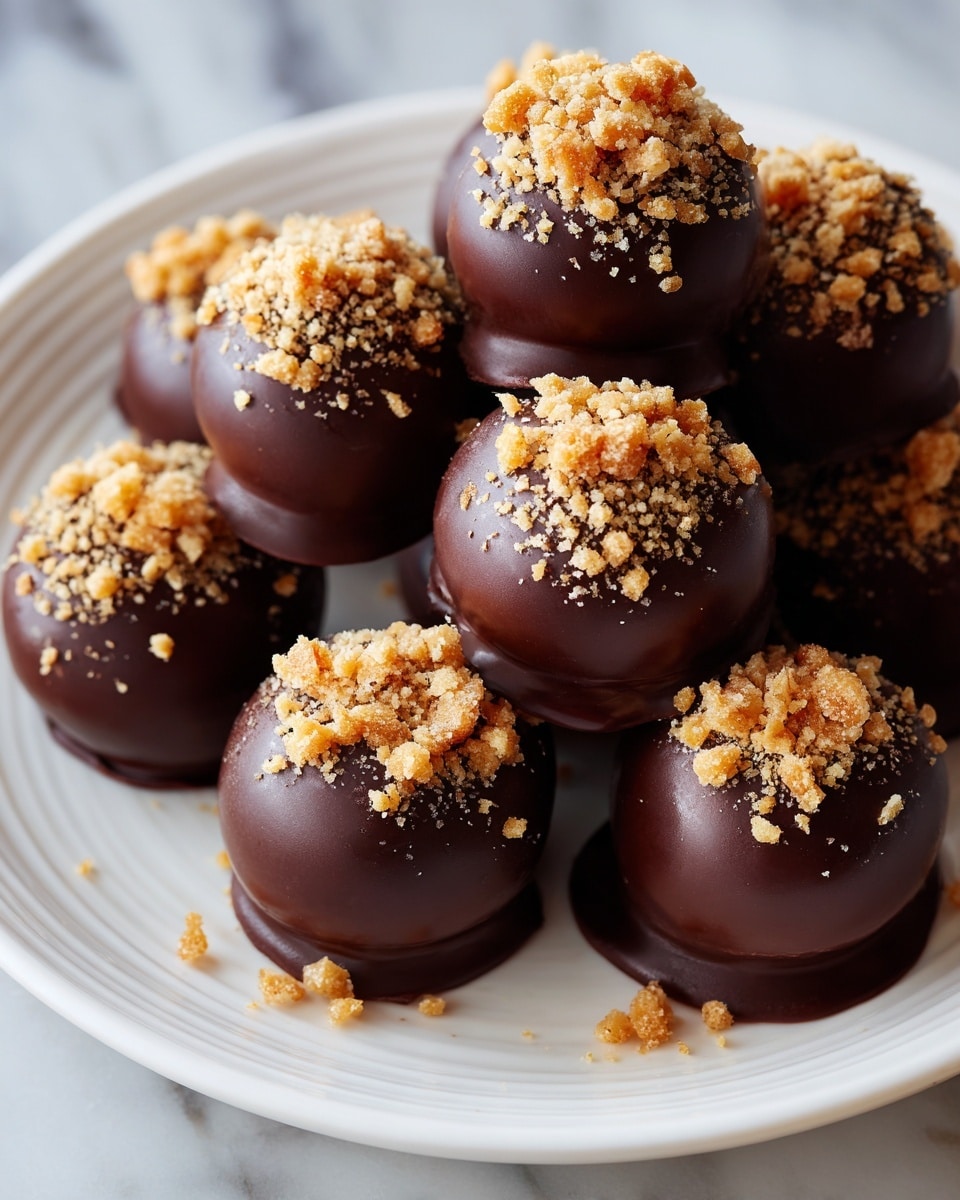
Garnishes
While these Easy Butterfinger Balls Recipe treats are stellar on their own, you can get playful with garnishes too. Try sprinkling a pinch of crushed Butterfinger crumbs, flaky sea salt, or even crushed peanuts on top of the chocolate before it sets for a little extra texture and visual appeal.
Side Dishes
These buttery delights pair wonderfully with a scoop of vanilla ice cream or a fresh fruit platter to balance out the sweetness. They also make a fantastic accompaniment to a warm cup of coffee or a rich hot chocolate, turning any treat time into a mini celebration.
Creative Ways to Present
If you’re feeling festive, arrange the Butterfinger balls in colorful mini cupcake liners or display them on a decorative platter with edible flowers or holiday sprinkles. For gifting, pack them in a clear box tied with a ribbon for a homemade gift that’s sure to wow family and friends.
Make Ahead and Storage
Storing Leftovers
Leftover Easy Butterfinger Balls recipe treats keep beautifully in an airtight container in the refrigerator. The cool temp helps maintain their shape and crunch, so they stay perfect for snacking throughout the week.
Freezing
For longer storage, freeze the uncoated or chocolate-covered balls in a single layer on a baking sheet, then transfer them to a freezer-safe container or bag. When properly wrapped, they keep fresh for up to 3 months without losing that incredible flavor or texture.
Reheating
When you’re ready to enjoy frozen Butterfinger balls, simply thaw them overnight in the fridge. Since they’re best served chilled, there’s no need to reheat—just bite in and savor that perfect mix of creamy and crunchy.
FAQs
Can I use a different candy bar instead of Butterfinger?
Absolutely! While Butterfinger candy bars are the star ingredient here, you can experiment with similar crunchy peanut butter candies or even crushed candy bars like Reese’s for a unique twist on the recipe.
Is it necessary to freeze the balls before dipping in chocolate?
Yes, freezing the balls helps them firm up so they keep their shape when dipped. It also makes the chocolate coating process easier and cleaner, avoiding melting or flattening of the balls.
Can I use milk chocolate or white chocolate instead?
You can definitely customize the recipe using your favorite chocolate type. Milk chocolate or white chocolate both add a different flavor profile, but be mindful that white chocolate can be trickier to melt smoothly without seizing.
Can these Butterfinger Balls be made vegan or dairy-free?
With some ingredient swaps like vegan cream cheese and dairy-free chocolate chips, you could adapt this Easy Butterfinger Balls Recipe for a dairy-free or vegan version. Just make sure to check the candy bar ingredients or substitute with a vegan-friendly crunchy candy.
How long do Butterfinger balls last in the fridge?
Stored properly in an airtight container, these balls stay fresh for up to one week in the refrigerator. For the best texture and flavor, try to enjoy them within this timeframe.
Final Thoughts
There’s something truly special about this Easy Butterfinger Balls Recipe that makes it a crowd-pleaser every single time. The dance of crispy candy, creamy filling, and rich chocolate shell is an irresistible combo you’ll find yourself wanting to make again and again. Whether for a fun family treat, a party dessert, or a homemade gift, these bites bring joy with every delicious mouthful. So grab those Butterfinger bars and get ready to create your new favorite indulgence!
Print
Easy Butterfinger Balls Recipe
- Total Time: 1 hour
- Yield: 24 servings 1x
Description
These Easy Butterfinger Balls are a delightful no-bake treat combining crushed Butterfinger candy bars with creamy sweetened cream cheese, dipped in rich melted chocolate. Perfect for parties or a quick sweet craving, they require minimal prep and freezing time for a deliciously crunchy, chocolaty bite.
Ingredients
Filling
- 2 cups crushed Butterfinger candy bars
- 1 (8-ounce) package cream cheese, softened
- 2 cups powdered sugar
- 1 teaspoon vanilla extract
Coating
- 2 cups semi-sweet chocolate chips
- 1 tablespoon coconut oil or vegetable oil (optional)
Instructions
- Prepare the Filling: Beat the softened cream cheese, powdered sugar, and vanilla extract together until smooth and creamy, ensuring no lumps remain.
- Fold in Candy: Gently fold the crushed Butterfinger candy bars into the cream cheese mixture evenly, so every bite has a crunchy candy texture.
- Form the Balls: Using your hands or a small scoop, roll the mixture into 1-inch diameter balls and place them spaced out on a parchment-lined baking sheet.
- Freeze the Balls: Freeze the formed balls for 30 minutes to firm them up for easier coating.
- Melt the Chocolate: In a microwave-safe bowl, melt the semi-sweet chocolate chips in 20-second intervals, stirring in between until fully smooth. Stir in coconut oil or vegetable oil if using, for a more liquid and glossy coating.
- Coat the Balls: Dip each frozen Butterfinger ball into the melted chocolate using a fork or skewer, ensuring full coverage, then place them back onto the parchment-lined sheet.
- Set the Coating: Refrigerate the chocolate-coated balls for 10 to 15 minutes or until the chocolate hardens completely.
- Serve or Store: Serve immediately as a delicious treat or store in an airtight container in the refrigerator for up to one week to maintain freshness.
Notes
- Use parchment paper to prevent sticking and make cleanup easier.
- You can substitute semi-sweet chocolate chips with dark or milk chocolate chips for different flavor profiles.
- For a smoother chocolate coating, adding coconut or vegetable oil is optional but recommended.
- Ensure the cream cheese is fully softened to avoid lumps in the filling mixture.
- The freezing step is essential to prevent the balls from falling apart when dipping in chocolate.
- Store in airtight containers to keep them fresh and prevent the chocolate from blooming.
- Prep Time: 15 minutes
- Cook Time: 0 minutes
- Category: Dessert
- Method: No-Cook
- Cuisine: American

