Easy Vegan Kimchi Recipe
If you’ve ever dreamed of a spicy, tangy, and probiotic-packed dish that’s as good for your body as it is for your taste buds, you need Easy Vegan Kimchi in your life. This classic Korean staple gets a plant-powered twist, yet still bursts with bold flavors and irresistible crunch. It’s the ideal balance of fire, funk, and freshness, perfect for stacking on rice bowls, layering in sandwiches, or snacking straight from the jar. Whether you’re a fermentation fanatic or a total beginner, this recipe will guide you to homemade magic you’ll reach for again and again.
Ingredients You’ll Need
You only need a handful of wholesome, easy-to-find ingredients to create Easy Vegan Kimchi, but each one plays a starring role. Together they create that signature combination of heat, umami, and crisp-tender texture that makes kimchi unforgettable.
- Napa cabbage: The iconic base, offering a sweet crunch and ideal leaves for soaking up flavor.
- Sea salt (non-iodized): Essential for drawing out moisture and kicking off fermentation while keeping bitterness at bay.
- Water: Helps the salt permeate the cabbage, starting the tenderizing process.
- Carrot (julienned): Adds subtle sweetness and cheerful color strips for extra crunch.
- Green onions: Bring a mild, zesty bite that rounds out the flavor profile.
- Grated fresh ginger: Gives Easy Vegan Kimchi a peppery, warming touch that sings in every bite.
- Garlic (minced): Delivers bold aroma and deep, aromatic depth for authentic flavor.
- Sugar or maple syrup: Feeds fermentation and balances heat with a hint of sweetness; maple syrup keeps things refined sugar-free.
- Gochugaru (Korean red pepper flakes): This is where the magic happens—classic red coloring and just the right level of kick without overpowering.
- Soy sauce or tamari: Grounds everything with umami, and tamari keeps it gluten-free—everyone’s welcome!
- Optional: Daikon radish (julienned): For extra crunch and an earthy note that some kimchi lovers can’t live without.
How to Make Easy Vegan Kimchi
Step 1: Prep and Salt the Cabbage
Start by slicing your napa cabbage lengthwise into quarters, then cut each quarter into bite-sized pieces. Transfer the cabbage to a large bowl, sprinkle evenly with the sea salt, and toss thoroughly. Pour in the water, making sure all the cabbage gets a chance to bathe in the salty solution. Over the next 1 to 2 hours, give it a toss every 30 minutes. The salt will slowly draw out moisture and soften the cabbage, creating the perfect crunchy-yet-tender texture that’s a hallmark of Easy Vegan Kimchi.
Step 2: Drain and Rinse the Cabbage
Once your cabbage has had its salty spa treatment, it’s time for a rinse. Drain the salted cabbage thoroughly, then rinse it under cold water to wash away excess salt. This ensures your kimchi ends up perfectly seasoned—not overly salty. Let it sit in a colander for about 15 to 20 minutes to drip dry, which helps the spice paste adhere beautifully in the next step.
Step 3: Make the Flavor Paste
While the cabbage is draining, grab a medium mixing bowl and combine the minced garlic, grated ginger, sugar (or maple syrup), gochugaru, and soy sauce (or tamari). Mix these together until they form a thick, fiery paste. If you love a little extra crunch or color, stir in your julienned carrot, green onions, and daikon radish. This paste is the powerhouse behind the punchy, unforgettable flavor of Easy Vegan Kimchi.
Step 4: Massage the Cabbage with Paste
Slip on a pair of kitchen gloves (trust me on this, unless you love spicy fingers for days), and gently but thoroughly mix the cabbage with the spicy paste mixture. Massage until every piece is evenly coated and brightly speckled—you want all those flavors to cling to every bite. The scent alone at this stage will have everyone sneaking bites!
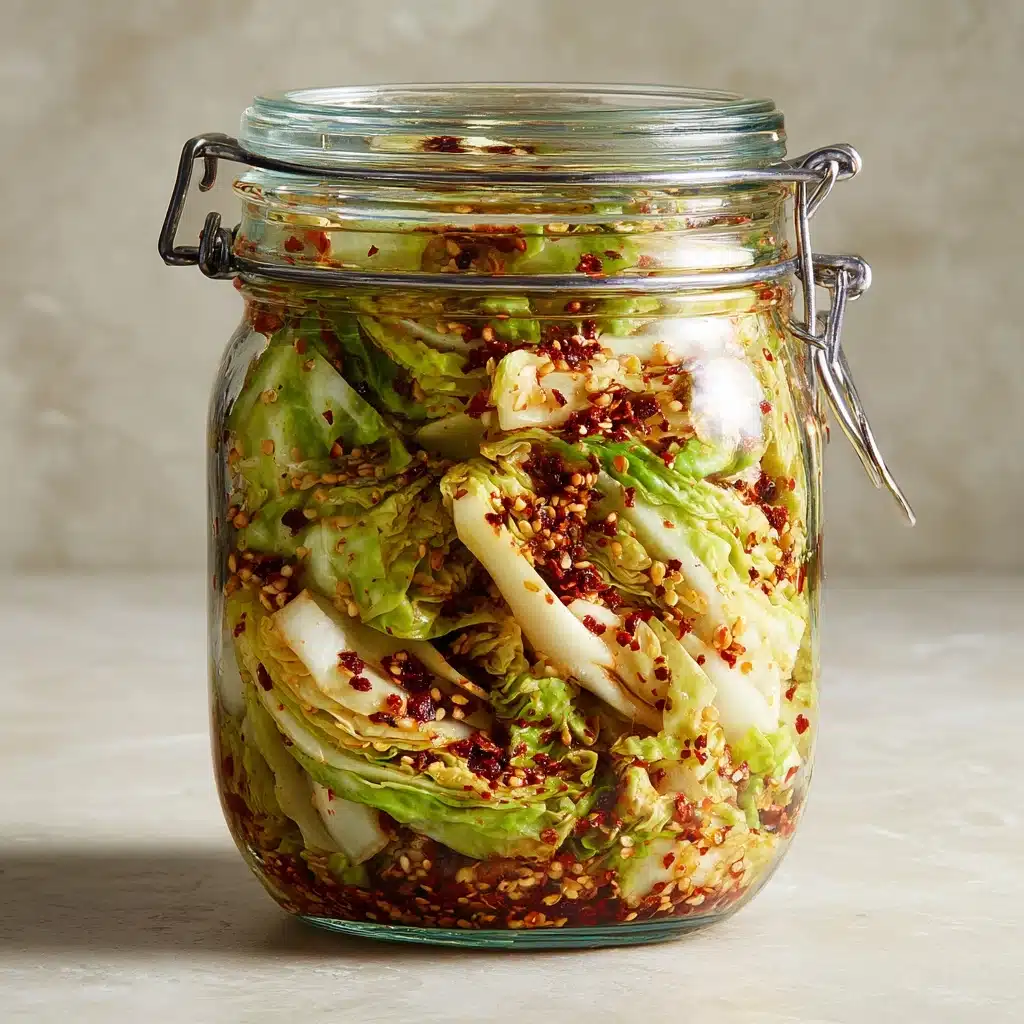
Step 5: Pack into Jars and Ferment
Pack your seasoned cabbage tightly into a clean glass jar or airtight container, pressing down as you go to remove any air pockets. Leave about an inch of space at the top to give the kimchi room to bubble up as it ferments. Let it sit on your countertop at room temperature for 1 to 3 days—check daily and open the lid to let gases escape. Taste it each day until it’s just the right level of tangy for your liking. Once it reaches flavor perfection, pop it into the fridge and savor your homemade Easy Vegan Kimchi for weeks to come.
How to Serve Easy Vegan Kimchi

Garnishes
Give Easy Vegan Kimchi a proper spotlight by garnishing with a sprinkle of extra sliced green onions, a handful of toasted sesame seeds, or even a scattering of shredded nori. These simple touches add color, contrast, and a delightful hint of nutty crunch or umami that truly elevates each serving.
Side Dishes
Traditional Korean meals embrace banchan—small plates meant for sharing—so try serving your Easy Vegan Kimchi alongside fluffy steamed rice, crispy vegan pancakes, or a hearty miso soup. These sides balance the kimchi’s spice and bring comfort to every bite.
Creative Ways to Present
Don’t limit your Easy Vegan Kimchi to a humble side! Pile it high on avocado toast, stuff it in grain bowls, jazz up your plant-based burgers, or even add a spoonful to tacos and grilled cheese sandwiches. Its versatility is just waiting to be explored, so get playful.
Make Ahead and Storage
Storing Leftovers
Kimchi only gets better as it sits! Store any leftovers in an airtight glass container or jar in the fridge. The fermentation slows in the cold, letting flavors develop even further while keeping your kimchi crisp for up to a month or more. Make sure your utensils are clean every time you dip in to avoid any rogue bacteria.
Freezing
While kimchi aficionados debate the merits, you can absolutely freeze Easy Vegan Kimchi for longer storage. Transfer it to airtight freezer containers or bags, leaving a little space for expansion. It will last for up to three months. Thaw overnight in the fridge; the texture may soften, but the flavor will still pop.
Reheating
Kimchi is usually enjoyed chilled or at room temperature, but if you want to toss it into a stir-fry or soup, simply use it straight from the fridge—no reheating needed. If you do warm it up, do so gently over low heat and just until heated through so you don’t lose its signature crunch.
FAQs
Is Easy Vegan Kimchi really as flavorful as traditional kimchi?
Absolutely! By keeping all the classic aromatics and swapping fish sauce with soy sauce or tamari, Easy Vegan Kimchi still delivers that iconic spicy, garlicky, and umami-packed profile without any animal products.
How spicy is Easy Vegan Kimchi?
The heat level is totally in your hands. Three tablespoons of gochugaru make a nice medium kick, but you can use less for a mild batch or more if you crave extra fire. Taste as you go and adjust to your preference!
How long does fermentation take?
Fermenting at room temperature usually takes 1 to 3 days. Warmer rooms speed things up, cooler ones slow it down. Taste daily and move to the fridge once it’s just tangy enough for you!
Can I use a different type Side Dish, Condiment
Napa cabbage is traditional for its tender-crisp leaves, but in a pinch, you could substitute savoy or even regular green cabbage—the texture and flavor will shift a bit, but you’ll still have delicious homemade Easy Vegan Kimchi.
Can I double or halve this recipe?
Definitely! The recipe scales beautifully, so go big if you want to share with friends or make a small batch for yourself. Just keep the ingredient ratios and watch the fermentation time.
Final Thoughts
Bringing a jar of Easy Vegan Kimchi into your fridge is like adding a spark of joy to every meal. This recipe is forgiving, flexible, and incredibly rewarding, whether you’re a seasoned fermenter or a first-timer. Give it a try and get ready to turn the simplest dishes into something spectacular!
Print
Easy Vegan Kimchi Recipe
- Total Time: 25 minutes (plus fermenting time)
- Yield: 1 quart 1x
- Diet: Vegan, Gluten-Free
Description
Learn how to make a delicious Easy Vegan Kimchi at home with this simple recipe. This plant-based version of the traditional Korean side dish is full of flavor and perfect for adding a tangy kick to your meals.
Ingredients
Napa Cabbage
- 1 medium napa cabbage (about 2 pounds)
Sea Salt Mixture
- 1/4 cup sea salt (non-iodized)
- 2 cups water
Kimchi Paste
- 1 medium carrot (julienned)
- 4 green onions (sliced)
- 1 tablespoon grated fresh ginger
- 4 cloves garlic (minced)
- 1 tablespoon sugar or maple syrup
- 3 tablespoons gochugaru (Korean red pepper flakes)
- 2 tablespoons soy sauce or tamari (for gluten-free)
- Optional: 1 small daikon radish (julienned)
Instructions
- Prepare Cabbage: Cut the napa cabbage into bite-sized pieces, toss with sea salt and water, and let it soften.
- Drain and Rinse: After soaking, rinse the cabbage thoroughly and let it drain.
- Make Kimchi Paste: Combine garlic, ginger, sugar, gochugaru, and soy sauce. Add carrots, green onions, and daikon.
- Coat Cabbage: Mix the cabbage with the paste until coated.
- Ferment Kimchi: Pack into a jar, leaving space at the top. Ferment for 1-3 days at room temperature, then refrigerate.
Notes
- Kimchi will continue to ferment slowly in the fridge and can last for several weeks.
- Adjust spice level by reducing or increasing gochugaru.
- Always use clean utensils to avoid contamination.
- Prep Time: 25 minutes
- Cook Time: 0 minutes
- Category: Side Dish, Condiment
- Method: Fermenting
- Cuisine: Korean
Nutrition
- Serving Size: 1/4 cup
- Calories: 20
- Sugar: 2g
- Sodium: 330mg
- Fat: 0g
- Saturated Fat: 0g
- Unsaturated Fat: 0g
- Trans Fat: 0g
- Carbohydrates: 4g
- Fiber: 1g
- Protein: 1g
- Cholesterol: 0mg


