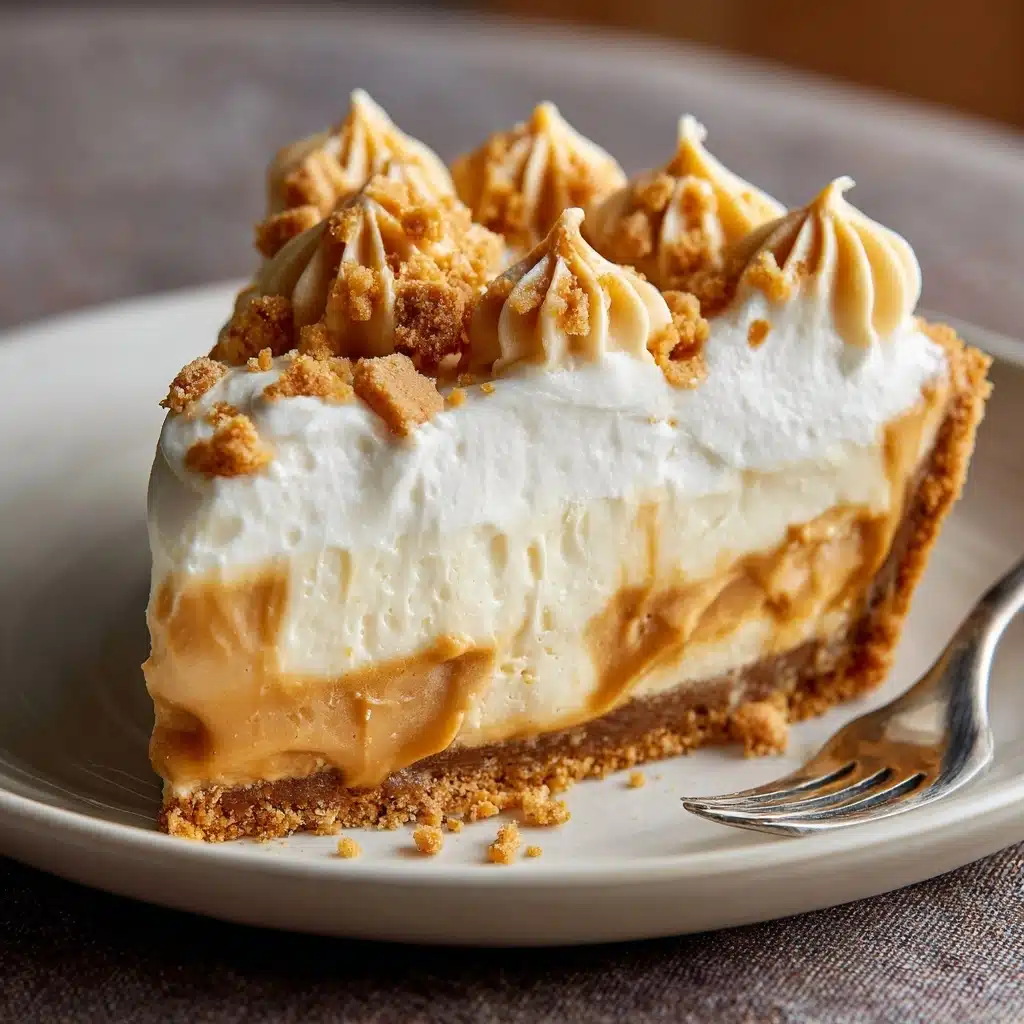
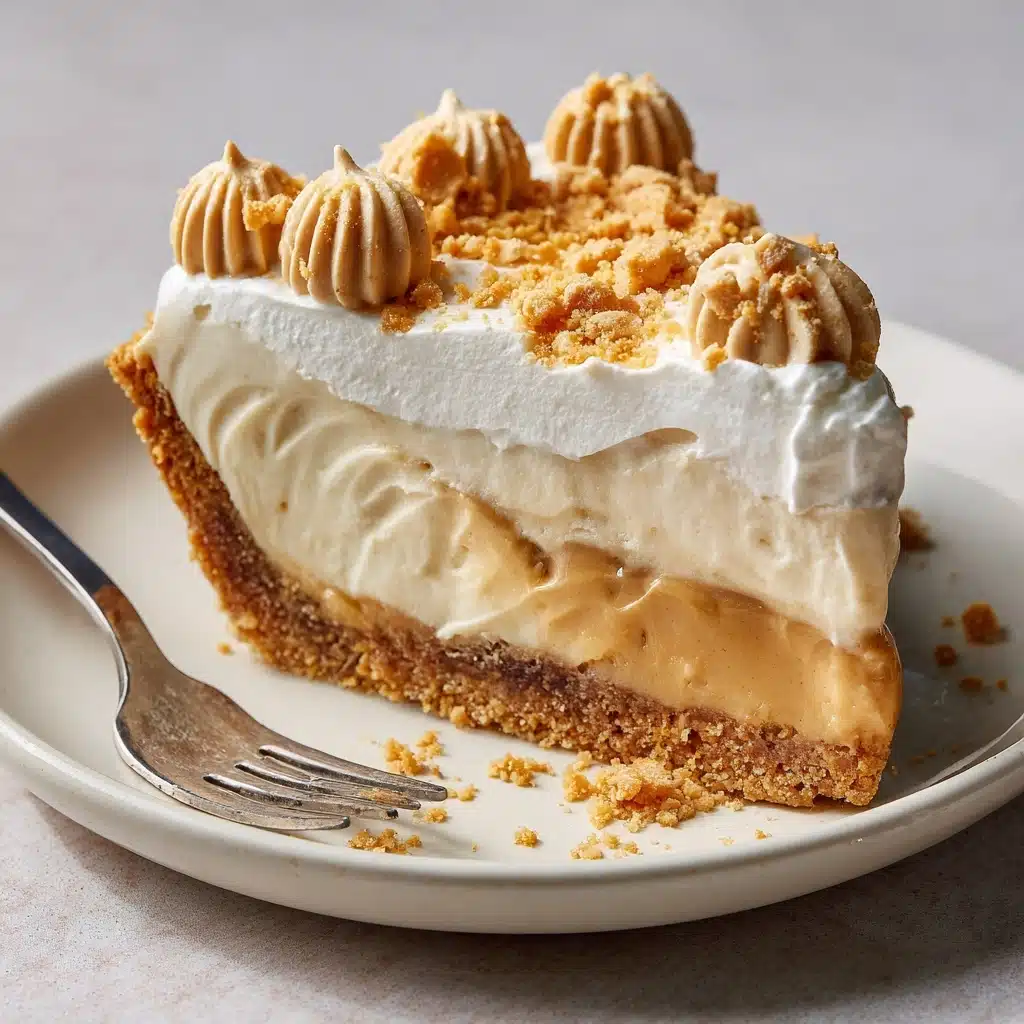
Peanut Butter Pie Recipe
If you’re ready for a slice of pure comfort, look no further than this Peanut Butter Pie. Silky, creamy, and indulgently rich, this dessert is the absolute definition of peanut butter dreams come true. With a crunchy graham cracker crust, a cloud-like peanut butter filling, and the option of extra garnishes for flair, it’s a family favorite everyone asks for again and again. Whether you’re a baking novice or a seasoned dessert maker, you’ll have this crowd-pleaser chilling in the fridge in less than 20 minutes—then all that’s left to do is wait for it to set!
Ingredients You’ll Need
One of the best things about this Peanut Butter Pie is how simple yet essential each ingredient is. Every component brings out the dreamy texture, rich nutty flavor, or a little crunch in every bite. Here’s what you’ll need, plus why it matters:
- Graham cracker crust: The buttery, crumbly base perfectly balances the creamy pie filling and adds a subtle honey note.
- Creamy peanut butter: This is the star of the show, lending unbeatable richness—go for classic creamy for the silkiest texture.
- Softened cream cheese: Adds tang and an irresistible, velvety body to the filling, so don’t skip softening it for a lump-free mix.
- Powdered sugar: Sweetens and helps create that perfect, melt-in-your-mouth lightness.
- Vanilla extract: Rounds out the flavors and adds a gentle aromatic warmth to the pie.
- Whipped topping (like Cool Whip): Makes the filling airy and dreamy—plus, it’s also ideal for swirly garnish on top.
- Chocolate syrup (optional for topping): A little drizzle turns each slice into a showstopper.
- Chopped peanuts or mini chocolate chips (optional for garnish): These add crunch, color, and a playful finishing touch.
How to Make Peanut Butter Pie
Step 1: Make the Peanut Butter Filling
In a large mixing bowl, beat the peanut butter and the softened cream cheese together until the mixture is perfectly smooth and creamy. You want to whip it enough to make sure there are no lumps and the flavors are nicely blended—this is the heart of your Peanut Butter Pie, so take a moment to appreciate that thick, dreamy batter coming together!
Step 2: Sweeten and Flavor the Mixture
Add the powdered sugar and vanilla extract into the bowl, then continue beating until everything is fully incorporated. You’ll notice the filling becomes fluffy and lighter in color. That touch of vanilla really makes the peanut butter flavor sing, and now the whole kitchen should start smelling amazing.
Step 3: Fold in the Whipped Topping
Gently fold in the whipped topping using a spatula or large spoon. This is where your Peanut Butter Pie filling transforms into something spectacularly airy. Try not to overmix—you want to keep as much fluffiness as possible for the perfect mousse-like texture.
Step 4: Fill the Graham Cracker Crust
Spoon the luscious filling into your graham cracker crust and smooth the top with a spatula. Don’t worry about making it perfectly even—a few swoops give it a homemade, inviting look. This step comes together so quickly, you’ll be tempted to sneak a taste of that filling before it even chills!
Step 5: Chill to Set
Pop your assembled pie into the refrigerator and let it chill for at least four hours, or until fully set. The wait might feel long, but this is what gives Peanut Butter Pie its sliceable, creamy dreaminess. For best flavor, you can even make it the night before—hello, dessert prep!
Step 6: Garnish and Serve
When you’re ready to impress, top your chilled Peanut Butter Pie with extra whipped topping, a drizzle of chocolate syrup, and a sprinkle of chopped peanuts or mini chocolate chips. Each little flourish adds not just beauty, but a delightful crunch or extra touch of chocolatey goodness.
How to Serve Peanut Butter Pie
Garnishes
Crank up the wow factor by piling on the toppings! A pretty cloud of whipped topping, glistening streaks of chocolate syrup, and a handful of chopped peanuts or chocolate chips make the pie look festive and irresistible. Play with your garnishes—fresh strawberries or even a dusting of cocoa powder work beautifully, too.
Side Dishes
Peanut Butter Pie is so rich and luscious, it pairs best with simple sides that keep the spotlight on its creamy filling. Serve each slice with a cup of hot coffee, a tall glass of ice-cold milk, or a scoop of vanilla ice cream for classic comfort. A few berries on the side never hurt, either!
Creative Ways to Present
Want to take your Peanut Butter Pie from home-style to dinner-party chic? Try making mini pies using a muffin tin, or whip up individual servings in mason jars for a fun twist. A big pie on a vintage cake stand with plenty of toppings also looks gorgeously retro. However you serve it, this pie is a showstopper!
Make Ahead and Storage
Storing Leftovers
Leftover Peanut Butter Pie is, quite honestly, a joy to look forward to. Simply cover the pie pan tightly with plastic wrap or slip individual slices into airtight containers and refrigerate. The texture stays creamy and dreamy for 3 to 4 days—if it lasts that long!
Freezing
Want to stash a few slices for future cravings? Peanut Butter Pie freezes beautifully! Slice it up, separate with parchment, and wrap well before freezing for up to two months. Thaw in the fridge overnight for best results—you’ll have an almost-instant dessert when friends drop by.
Reheating
No reheating needed for this chilly wonder! Enjoy it straight from the fridge (or slightly softened from the freezer). If you prefer a softer filling, let it sit at room temperature for 10 minutes before serving.
FAQs
Can I use crunchy peanut butter instead of creamy?
Absolutely! Crunchy peanut butter will give your Peanut Butter Pie extra texture and little pops of peanut in every bite. It’s a fun twist if you love a bit of crunch—but the classic creamy version stays silky smooth.
Is it possible to make this pie dairy-free?
Yes, there are some great swaps available! Use dairy-free cream cheese and a coconut-based whipped topping. There are also vegan graham cracker crust options at most grocery stores—you can enjoy Peanut Butter Pie even if you’re dairy-free.
Can I make this ahead of time?
Definitely! In fact, Peanut Butter Pie is even better when it has time to chill overnight. Just wait to add garnishes until just before serving for the freshest look.
What if I don’t have a graham cracker crust?
No worries! A chocolate cookie crust is delicious for an even richer treat, or you can make your own graham cracker crust from scratch with crushed crackers, a bit of sugar, and melted butter. Either way, the pie will be irresistible.
Does this pie need to be baked?
Not at all! Peanut Butter Pie is entirely no-bake, making it the easiest go-to dessert for any time of year. The filling sets beautifully in the fridge—no oven required.
Final Thoughts
I can’t wait for you to try this Peanut Butter Pie—it’s a ridiculously easy, crowd-pleasing dessert that’s bursting with peanut butter love in every bite. Whether you’re treating yourself or sharing with friends, one slice truly isn’t enough. Whip up this pie soon and watch it become an instant favorite!
Print
Peanut Butter Pie Recipe
- Total Time: 4 hours 15 minutes (includes chilling)
- Yield: 8 servings 1x
- Diet: Non-Vegetarian
Description
Indulge in the creamy, rich goodness of this no-bake Peanut Butter Pie. With a luscious peanut butter and cream cheese filling, this dessert is a peanut lover’s dream. Topped with whipped cream and optional chocolate syrup, it’s a perfect treat for any occasion.
Ingredients
Graham Cracker Crust:
- 1 (9-inch) graham cracker crust
Peanut Butter Filling:
- 1 cup creamy peanut butter
- 8 oz cream cheese, softened
- 1 cup powdered sugar
- 1 teaspoon vanilla extract
- 8 oz whipped topping (like Cool Whip), plus extra for garnish
Toppings (Optional):
- Chocolate syrup
- Chopped peanuts or mini chocolate chips
Instructions
- Prepare the Filling: In a large bowl, beat the peanut butter and softened cream cheese until smooth and creamy.
- Add Sweetness: Mix in the powdered sugar and vanilla extract until fully combined.
- Lighten the Mixture: Gently fold in the whipped topping until the filling is light and fluffy.
- Fill the Crust: Spoon the filling into the graham cracker crust and smooth the top with a spatula.
- Chill and Garnish: Refrigerate for at least 4 hours until set. Before serving, top with extra whipped cream, chocolate syrup, and chopped nuts or chocolate chips if desired.
- Serve: Slice and enjoy the chilled pie.
Notes
- For a richer version, consider using a chocolate cookie crust instead of graham cracker.
- When using natural peanut butter, ensure it’s well-stirred and not too oily for best results.
- Prep Time: 15 minutes
- Cook Time: 0 minutes
- Category: Dessert
- Method: No-Bake
- Cuisine: American
Nutrition
- Serving Size: 1 slice
- Calories: 430
- Sugar: 22g
- Sodium: 280mg
- Fat: 30g
- Saturated Fat: 11g
- Unsaturated Fat: 16g
- Trans Fat: 0g
- Carbohydrates: 32g
- Fiber: 2g
- Protein: 7g
- Cholesterol: 25mg


