Gluten-Free Mini Cheesecakes Recipe
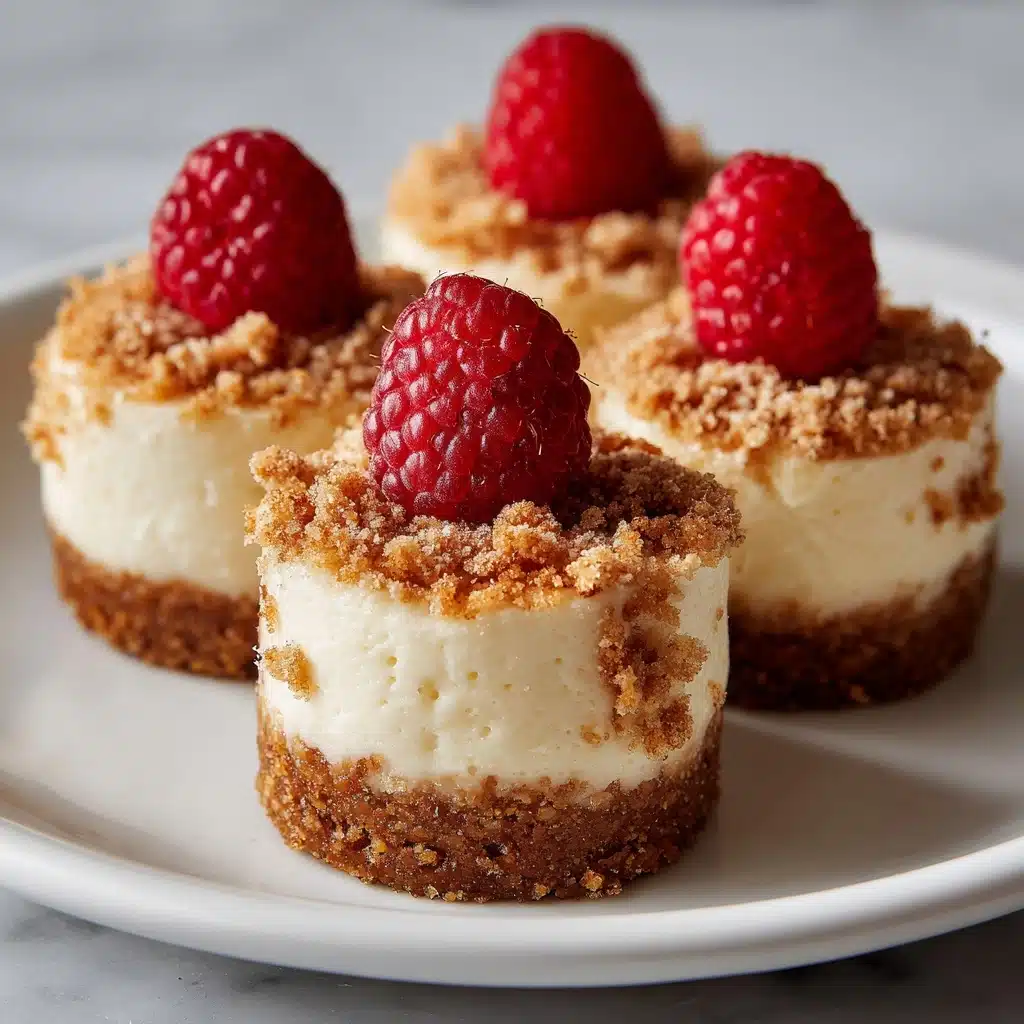
Meet your new obsession: Gluten-Free Mini Cheesecakes! These adorable, poppable treats capture all the decadence of classic cheesecake in a petite, perfectly portioned format—without a trace of gluten. With a silky cream cheese filling, a buttery graham cracker crust, and endless options for fancy toppings, they truly shine at birthday parties, brunches, or as a little pick-me-up after dinner. And best of all, you’ll be surprised just how easy it is to whip up a batch, even if you’ve never made cheesecake before. Get ready to wow your friends and family with a dessert that’s as stunning as it is simple!
Ingredients You’ll Need
Ingredients You’ll Need
When it comes to Gluten-Free Mini Cheesecakes, every ingredient pulls its weight to deliver creamy, tangy, and totally irresistible results. From the crisp, golden crust to the ultra-smooth filling, each component brings its own magic—so let’s break it down and highlight why these basics matter!
- Gluten-free graham cracker crumbs (1 cup): The crunchy base for your mini cheesecakes, these add a nostalgic flavor and ensure everyone can indulge worry-free.
- Granulated sugar (2 tablespoons + ½ cup): Just enough sweetness to balance the tangy cream cheese and create a lusciously smooth filling.
- Unsalted butter, melted (4 tablespoons): This binds your crust and gives every bite rich, irresistible flavor.
- Cream cheese, softened (16 oz): The heart of the dessert—use good-quality cream cheese for that classic, velvety cheesecake texture.
- Large eggs (2): Eggs help set the filling for perfect creamy slices with just the right firmness.
- Vanilla extract (1 teaspoon): Vanilla’s cozy aroma elevates the whole dessert and perfectly complements the richness of the cream cheese.
- Sour cream (¼ cup): Adds just a touch of tang and keeps the filling super smooth.
- Pinch of salt: Salt brightens up every flavor for a balanced, not-too-sweet treat.
- Optional toppings: fresh berries, whipped cream, fruit compote: Toppings let you add color and creative flair—dress them up to suit every season or craving!
How to Make Gluten-Free Mini Cheesecakes
Step 1: Prep Your Muffin Tin
Start by preheating your oven to 325°F (160°C) so it’s ready and waiting. Line a standard 12-cup muffin tin with paper liners; this not only makes removing your Gluten-Free Mini Cheesecakes a breeze, but also ensures they keep their adorable shape. Trust me, skipping the liners is tempting, but cleanup gets tricky without them!
Step 2: Whip Up the Gluten-Free Crust
In a small bowl, combine your gluten-free graham cracker crumbs, 2 tablespoons of sugar, and the melted butter. Use a fork or your fingers to mix everything together until the crumbs look evenly moistened and hold together when you press them. Scoop about 1 tablespoon of crust into each muffin cup and give it a good press to form a firm, even base—your thumbs work great for this step!
Step 3: Blend the Cheesecake Filling
In a large mixing bowl, beat the softened cream cheese until it’s completely smooth and creamy. Add the ½ cup sugar and continue mixing until it looks light and fluffy, scraping down the bowl as needed. Next, add in the eggs one at a time, mixing well after each to avoid lumps. Stir in the vanilla, sour cream, and a pinch of salt, blending just until everything comes together with no streaks.
Step 4: Fill and Bake
Divide the creamy filling evenly among your muffin cups, spooning it directly on top of the crusts. Three-quarters full is perfect. Place the tin in the oven and bake for 16–18 minutes, or until the centers look set but still jiggle slightly when you gently shake the pan—remember, cheesecakes keep cooking a bit as they cool, so don’t overbake!
Step 5: Cool, Chill, and Decorate
Once the baking is done, turn off the oven, crack the door, and let your mini cheesecakes hang out inside for 10 minutes. This step helps prevent unsightly cracks. Move them to a cooling rack until they reach room temperature, then refrigerate for at least 2 hours (overnight is even better). Top with fresh berries, a swirl of whipped cream, or a spoonful of fruit compote right before serving for bakery-worthy Gluten-Free Mini Cheesecakes every time.
How to Serve Gluten-Free Mini Cheesecakes
Garnishes
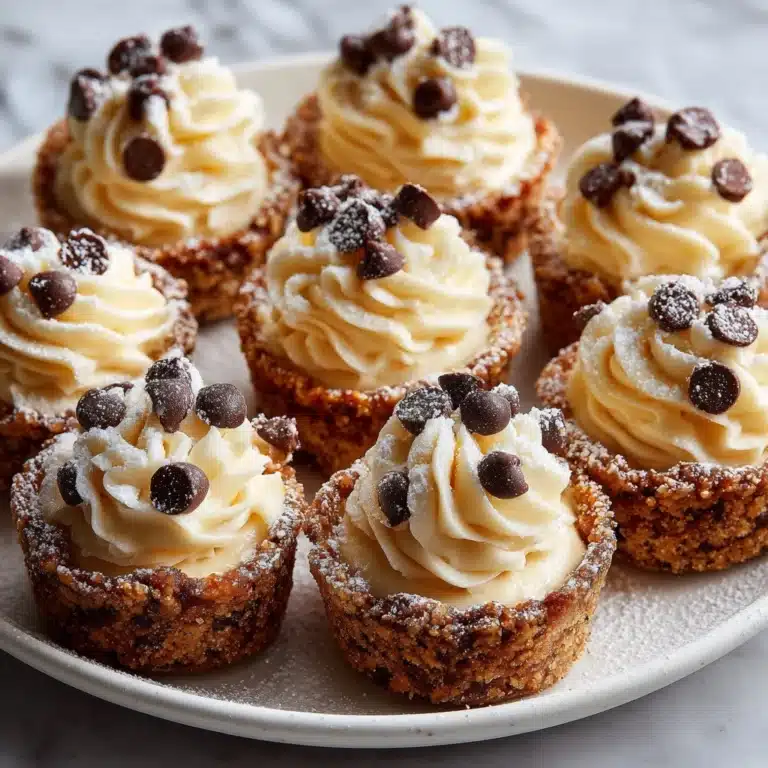
Taking your Gluten-Free Mini Cheesecakes from simple to stunning is all about the finishing touch. Sprinkle on a handful of vibrant fresh berries, pipe a pillowy swirl of whipped cream, or drizzle them with a jewel-toned fruit compote. Even a dusting of finely grated dark chocolate or a couple of mint leaves can add elegance, color, and contrast—just let your creativity shine!
Side Dishes
While these cheesecakes are delicious on their own, you can round out a dessert spread or afternoon tea with light nibbles on the side. Try serving them with a crisp lemon sorbet, dainty almond cookies (gluten-free, of course), or a tender fruit salad. Hot coffee or a chilled dessert wine also pairs beautifully for an extra-special end to your meal.
Creative Ways to Present
Presentation can make your Gluten-Free Mini Cheesecakes a true showstopper! Arrange them in colorful cupcake wrappers on a multi-tiered stand, or serve each one on a mini dessert plate with a personalized topper. For parties, consider offering a “cheesecake bar” with bowls of toppings—think crushed nuts, caramel sauce, or candied citrus peel—so guests can customize their own sweet creations.
Make Ahead and Storage
Storing Leftovers
Got extras? Lucky you! Keep your leftover Gluten-Free Mini Cheesecakes in an airtight container in the refrigerator. They’ll stay fresh and fabulous for up to 5 days. If you know you won’t finish them all at once, store without toppings, then garnish just before serving for the prettiest results.
Freezing
These minis freeze beautifully, making them ideal for prepping ahead. Arrange the un-topped cheesecakes on a baking sheet and freeze until solid. Once frozen, transfer to a zip-top bag or airtight container with a layer of parchment between each one. They’ll keep for up to 2 months—just thaw in the fridge before enjoying!
Reheating
No real reheating required; Gluten-Free Mini Cheesecakes are best enjoyed chilled or at cool room temperature. If you froze your cheesecakes, just move them to the refrigerator overnight to thaw gently. Avoid microwaving, as it can mess with the texture and cause the tops to crack—patience pays off here!
FAQs
Can I use something other than graham crackers for the crust?
Absolutely! Any gluten-free cookie that crumbles well can make a delicious and unique base. Think gluten-free vanilla wafers, chocolate sandwich cookies, or even ground nuts for a richer twist. Just make sure to keep the ratios similar to ensure the crust binds together perfectly.
How do I prevent my mini cheesecakes from cracking?
The secret to smooth, crack-free Gluten-Free Mini Cheesecakes is gentle cooling. Never yank them right out of the oven; instead, let them sit in the turned-off oven with the door ajar for a bit, then cool completely to room temperature before chilling in the fridge. This gradual temperature change keeps the tops smooth as silk.
Can I make these dairy-free?
Yes, you can swap the cream cheese, sour cream, and butter for your favorite non-dairy alternatives. Look for plant-based cream cheese and sour cream brands made for baking, and use vegan butter in the crust. The texture and flavor will change slightly, but you’ll still get a luscious mini cheesecake experience.
How long should I chill the cheesecakes before serving?
At least 2 hours in the fridge is ideal for the perfect texture, but overnight chilling is even better. This gives the flavors time to meld and makes the cheesecakes much easier to unmold and decorate. If you’re short on time, an hour will do in a pinch, but chill as long as you can manage!
Which toppings pair best with Gluten-Free Mini Cheesecakes?
Fresh berries add a pop of color and tartness that cuts through the richness, but don’t stop there! Try lemon curd, caramel drizzle, toasted coconut, mini chocolate chips, or even a dash of espresso powder for grown-up flair. It’s hard to go wrong when you start with this creamy, dreamy base.
Final Thoughts
If you’re looking for a crowd-pleasing dessert that’s every bit as elegant as it is easy, don’t hesitate to try these Gluten-Free Mini Cheesecakes. Each bite delivers pure creamy bliss, whether you’re gluten-free or simply love a delicious treat in a cute little package. Gather your ingredients and get baking—there’s a good chance these will become a fast favorite in your home, too!
Print
Gluten-Free Mini Cheesecakes Recipe
- Total Time: 2 hours 33 minutes (including chilling)
- Yield: 12 mini cheesecakes 1x
- Diet: Non-Vegetarian
Description
Indulge in these delightful Gluten-Free Mini Cheesecakes that are perfect for any occasion. Creamy, smooth, and topped with your favorite fruits, these individual desserts will surely impress your guests.
Ingredients
For the crust:
- 1 cup gluten-free graham cracker crumbs
- 2 tablespoons granulated sugar
- 4 tablespoons unsalted butter, melted
For the filling:
- 16 oz cream cheese, softened
- 1/2 cup granulated sugar
- 2 large eggs
- 1 teaspoon vanilla extract
- 1/4 cup sour cream
- Pinch of salt
Optional toppings:
- Fresh berries
- Whipped cream
- Fruit compote
Instructions
- Preheat oven and prepare the crust: Preheat the oven to 325°F (160°C) and line a 12-cup muffin tin with paper liners. Mix graham cracker crumbs, sugar, and melted butter. Press mixture into each muffin cup.
- Make the filling: Beat cream cheese until smooth. Add sugar, eggs, vanilla, sour cream, and salt. Mix until creamy.
- Fill and bake: Divide filling over crusts and bake for 16–18 minutes until set. Let cool in the oven.
- Chill and serve: Cool to room temperature, then refrigerate for 2 hours. Top with desired toppings before serving.
Notes
- You can use crushed gluten-free cookies or nuts for the crust.
- These mini cheesecakes freeze well and can be made ahead for convenience.
- Prep Time: 15 minutes
- Cook Time: 18 minutes
- Category: Dessert
- Method: Baking
- Cuisine: American
Nutrition
- Serving Size: 1 mini cheesecake
- Calories: 220
- Sugar: 14g
- Sodium: 150mg
- Fat: 16g
- Saturated Fat: 9g
- Unsaturated Fat: 6g
- Trans Fat: 0g
- Carbohydrates: 16g
- Fiber: 0g
- Protein: 4g
- Cholesterol: 60mg


