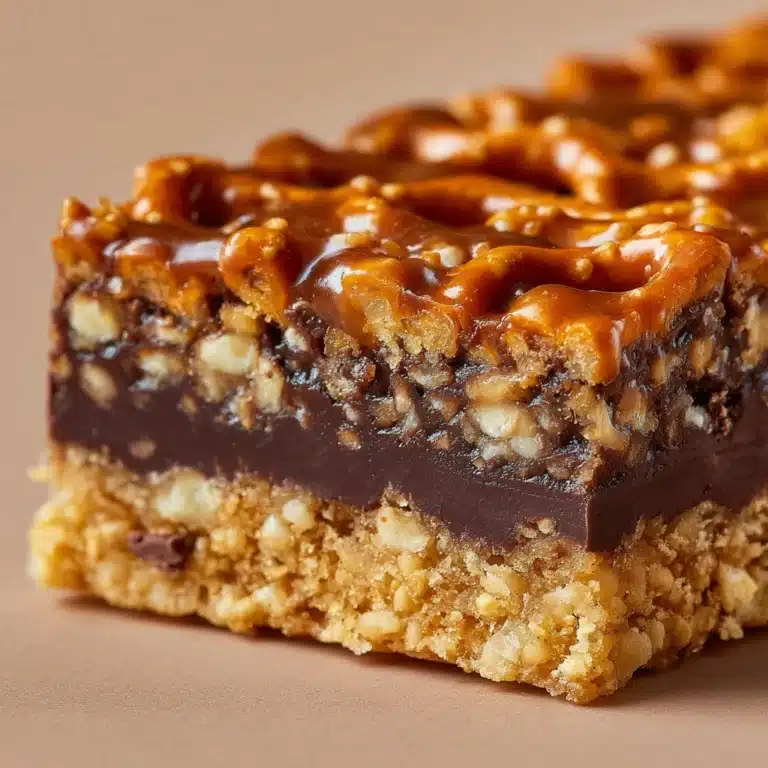
Chocolate Fruit and Nut Bars Recipe
If you’ve been searching for a delightful treat that perfectly balances rich chocolate with the wholesome goodness of fruits and nuts, then this Chocolate Fruit and Nut Bars Recipe is just what you need. It’s a no-fuss, no-bake snack that combines the crunch of almonds and walnuts with the natural sweetness of dried cranberries, apricots, and raisins, all held together by luscious melted chocolate. Whether you’re craving an afternoon pick-me-up or a homemade energy bar to fuel your day, these bars are an irresistible blend of texture, flavor, and nutrition.

Ingredients You’ll Need
Gathering the right ingredients is key to making these bars shine. Each one brings something special—whether it’s creamy texture, nutty crunch, or fruity brightness—that comes together beautifully in every bite.
- Semi-sweet chocolate chips (2 cups): The core ingredient that provides the creamy, rich chocolate flavor that holds everything together.
- Coconut oil or butter (1 tablespoon): Helps melt the chocolate smoothly and adds a subtle richness for a perfect consistency.
- Chopped almonds (1/2 cup): Adds a satisfying crunch and a slightly sweet nuttiness.
- Chopped walnuts (1/2 cup): Brings earthiness and a tender, buttery bite.
- Dried cranberries (1/2 cup): Offers a tart sweetness that contrasts beautifully with the chocolate.
- Chopped dried apricots (1/4 cup): Contributes a chewy texture and aromatic fruitiness.
- Raisins (1/4 cup): Adds natural sweetness and a slight chewiness.
- Sea salt (1/4 teaspoon, optional): A pinch enhances the chocolate’s flavor and balances the sweetness.
How to Make Chocolate Fruit and Nut Bars Recipe
Step 1: Prepare the Pan
Start by lining an 8×8-inch baking dish with parchment paper. This step makes removing the bars super easy once they’ve set and ensures clean edges for cutting.
Step 2: Melt the Chocolate and Coconut Oil
Using a double boiler or microwave, melt the semi-sweet chocolate chips together with the coconut oil (or butter). If microwaving, do it in 30-second bursts, stirring in between until the mixture is perfectly smooth and glossy.
Step 3: Mix in the Fruits and Nuts
Once your chocolate base is melted and silky, fold in the chopped almonds, walnuts, dried cranberries, apricots, and raisins. Stir gently but thoroughly until everything is evenly coated in chocolate, making sure the nuts and fruits are well-distributed.
Step 4: Spread and Set
Pour the mixture into your prepared baking dish and smooth it out with a spatula, spreading the mixture evenly. If you love that sweet-and-salty vibe, sprinkle a pinch of sea salt over the top to enhance the flavors.
Step 5: Chill Until Firm
Pop the dish into the fridge and let it chill for 1 to 2 hours, or until the bars are fully set and firm. This ensures a clean cut and a perfect snap when you slice them into bars or squares.
Step 6: Cut and Enjoy
Once set, carefully lift the parchment paper out of the dish and transfer to a cutting board. Slice into 12 evenly sized bars and get ready to enjoy your homemade snack masterpiece.
How to Serve Chocolate Fruit and Nut Bars Recipe

Garnishes
For a little extra flair, dust the bars lightly with cocoa powder or finely chopped nuts before serving. A drizzle of melted white or dark chocolate can add a pretty decorative touch, making them irresistible for guests or lunchbox treats.
Side Dishes
These bars do well as a standalone snack, but pairing them with a cup of hot coffee or herbal tea elevates the experience. For a light dessert, serve alongside fresh berries or a small scoop of vanilla ice cream.
Creative Ways to Present
Thinking beyond plain bars? Press the mixture into mini muffin tins before chilling for convenient, single-serve bites. Or wrap individual bars in parchment paper tied with a ribbon for a charming homemade gift anyone would love.
Make Ahead and Storage
Storing Leftovers
Keep any leftover bars fresh in an airtight container in the refrigerator. They will stay delicious and firm for up to two weeks, making them perfect for prepping snacks in advance.
Freezing
If you want to store these bars for longer, wrap each piece individually in plastic wrap and freeze them in a sealed container. When you’re ready, simply thaw in the fridge overnight for a quick and satisfying snack.
Reheating
Since these bars are best enjoyed cool and firm, reheating isn’t necessary. However, if you prefer a softer texture, leave them at room temperature for 10 to 15 minutes before eating—just enough to soften the chocolate without losing the delightful chew of the fruit and nuts.
FAQs
Can I use different nuts or dried fruits?
Absolutely! This recipe is wonderfully flexible. Feel free to swap in your favorite nuts like pecans or cashews, or try other dried fruits such as cherries or figs to suit your taste.
Is this recipe suitable for people with gluten intolerance?
Yes, this Chocolate Fruit and Nut Bars Recipe is naturally gluten-free, as it uses only nuts, dried fruits, and chocolate without any grains or gluten-containing ingredients.
How long do these bars last?
When stored properly in an airtight container in the fridge, they can last up to two weeks. For longer storage, freezing is an excellent option.
Can I make these bars vegan?
To make them vegan, use dairy-free chocolate chips and substitute butter with coconut oil, which is already an option in the recipe.
What if I want firmer bars at room temperature?
Using baking chocolate instead of chocolate chips will give a firmer texture even at room temperature. This slight adjustment helps the bars hold their shape better without needing refrigeration.
Final Thoughts
There’s something truly special about making your own Chocolate Fruit and Nut Bars Recipe—not just for the incredible flavors, but for the joy of crafting a snack that feels both indulgent and nourishing. Whether you’re packing them for a road trip, a quick office bite, or just treating yourself at home, these bars are sure to become one of your favorite go-to recipes. Give them a try, and I promise you’ll love every luscious, crunchy, fruity bite!
Print
Chocolate Fruit and Nut Bars Recipe
- Total Time: 2 hours 15 minutes
- Yield: 12 bars 1x
- Diet: Vegetarian, Gluten Free
Description
Delicious and easy-to-make Chocolate Fruit and Nut Bars combining rich semi-sweet chocolate with a nutritious blend of almonds, walnuts, and dried fruits. These no-bake bars are perfect as a healthy snack or homemade energy boost, ready in just over two hours including chilling time.
Ingredients
Chocolate Mixture
- 2 cups semi-sweet chocolate chips
- 1 tablespoon coconut oil or butter
Nuts
- 1/2 cup chopped almonds
- 1/2 cup chopped walnuts
Dried Fruits
- 1/2 cup dried cranberries
- 1/4 cup chopped dried apricots
- 1/4 cup raisins
Optional
- 1/4 teaspoon sea salt
Instructions
- Prepare the Pan: Line an 8×8-inch baking dish with parchment paper to prevent sticking and make bar removal easy.
- Melt Chocolate and Oil: In a heatproof bowl, melt the semi-sweet chocolate chips together with the coconut oil or butter using a double boiler or microwave. If microwaving, heat in 30-second intervals, stirring after each until the mixture is smooth and fully melted.
- Mix in Nuts and Fruits: Stir the chopped almonds, walnuts, dried cranberries, chopped apricots, and raisins into the melted chocolate until everything is evenly coated.
- Set in Pan: Pour the mixture into the prepared pan and spread it evenly using a spatula or the back of a spoon. Optionally, sprinkle sea salt over the top to enhance flavor.
- Chill: Refrigerate the pan for 1 to 2 hours or until the bars are fully set and firm.
- Cut and Serve: Once the bars are firm, remove the slab from the pan using the parchment paper edges and cut into 12 bars or squares. Store bars in an airtight container in the refrigerator.
Notes
- Customize these bars by using any combination of nuts and dried fruits you prefer for varied flavors and textures.
- For a firmer texture that holds up better at room temperature, substitute baking chocolate for semi-sweet chocolate chips.
- Store bars in an airtight container in the fridge for up to 2 weeks to maintain freshness and texture.
- Prep Time: 10 minutes
- Cook Time: 5 minutes
- Category: Snack
- Method: No-Cook
- Cuisine: American


